
5. Delete files with DataMapper - Admin (EN)
When you're in the process of cleaning up the scanned files in DataMapper, it also makes sense to have them deleted completely. Follow the simple steps below and get started with deletion now.
As of August 1, 2025, you can also delete documents scanned in OneDrive & Sharepoint using DataMapper. Below you can see how to activate the delete function for each of the locations.
Haven't scanned Sharepoint & OneDrive? Then you can simply skip these screenshots in the guide or reach out to our team, who can help you set it up.
It only takes 3 steps to activate the delete function:
- Step 1: Log in to DataMapper and click on Data locations
- Step 2: Activate the delete function
- Step 3: Select a file and press the "delete" button
Step 1: Log in to DataMapper and click on Data locations
When you log in as an administrator, you may first need to update consent on behalf of the organization. You need to do this because you must give the system access to delete, read, and review data.
Click the Data locations button and Update consent, so you "unlock" the new feature on behalf of all other users in DataMapper in your company.
If you've done this recently or aren't presented with the option, simply skip to step 2.

Select the account that has this permission - typically it's the same email you log in with as an administrator in DataMapper - and other times it's a separate Microsoft email.
Once you've logged in with that email, you'll be presented with the screen below, where you click Accept to give consent and update it. You'll then be sent back to DataMapper.

The new thing you need to consent to is "read and write email in all mailboxes"
❗️You may need to give consent twice (it's a Microsoft thing), but remember to refresh the page (F5 or command + R) to update DataMapper.
Step 2: Activate the delete function
For the "Delete" function to be unlocked for you, you need to click Settings next to each of the locations where you want the function activated, see below:
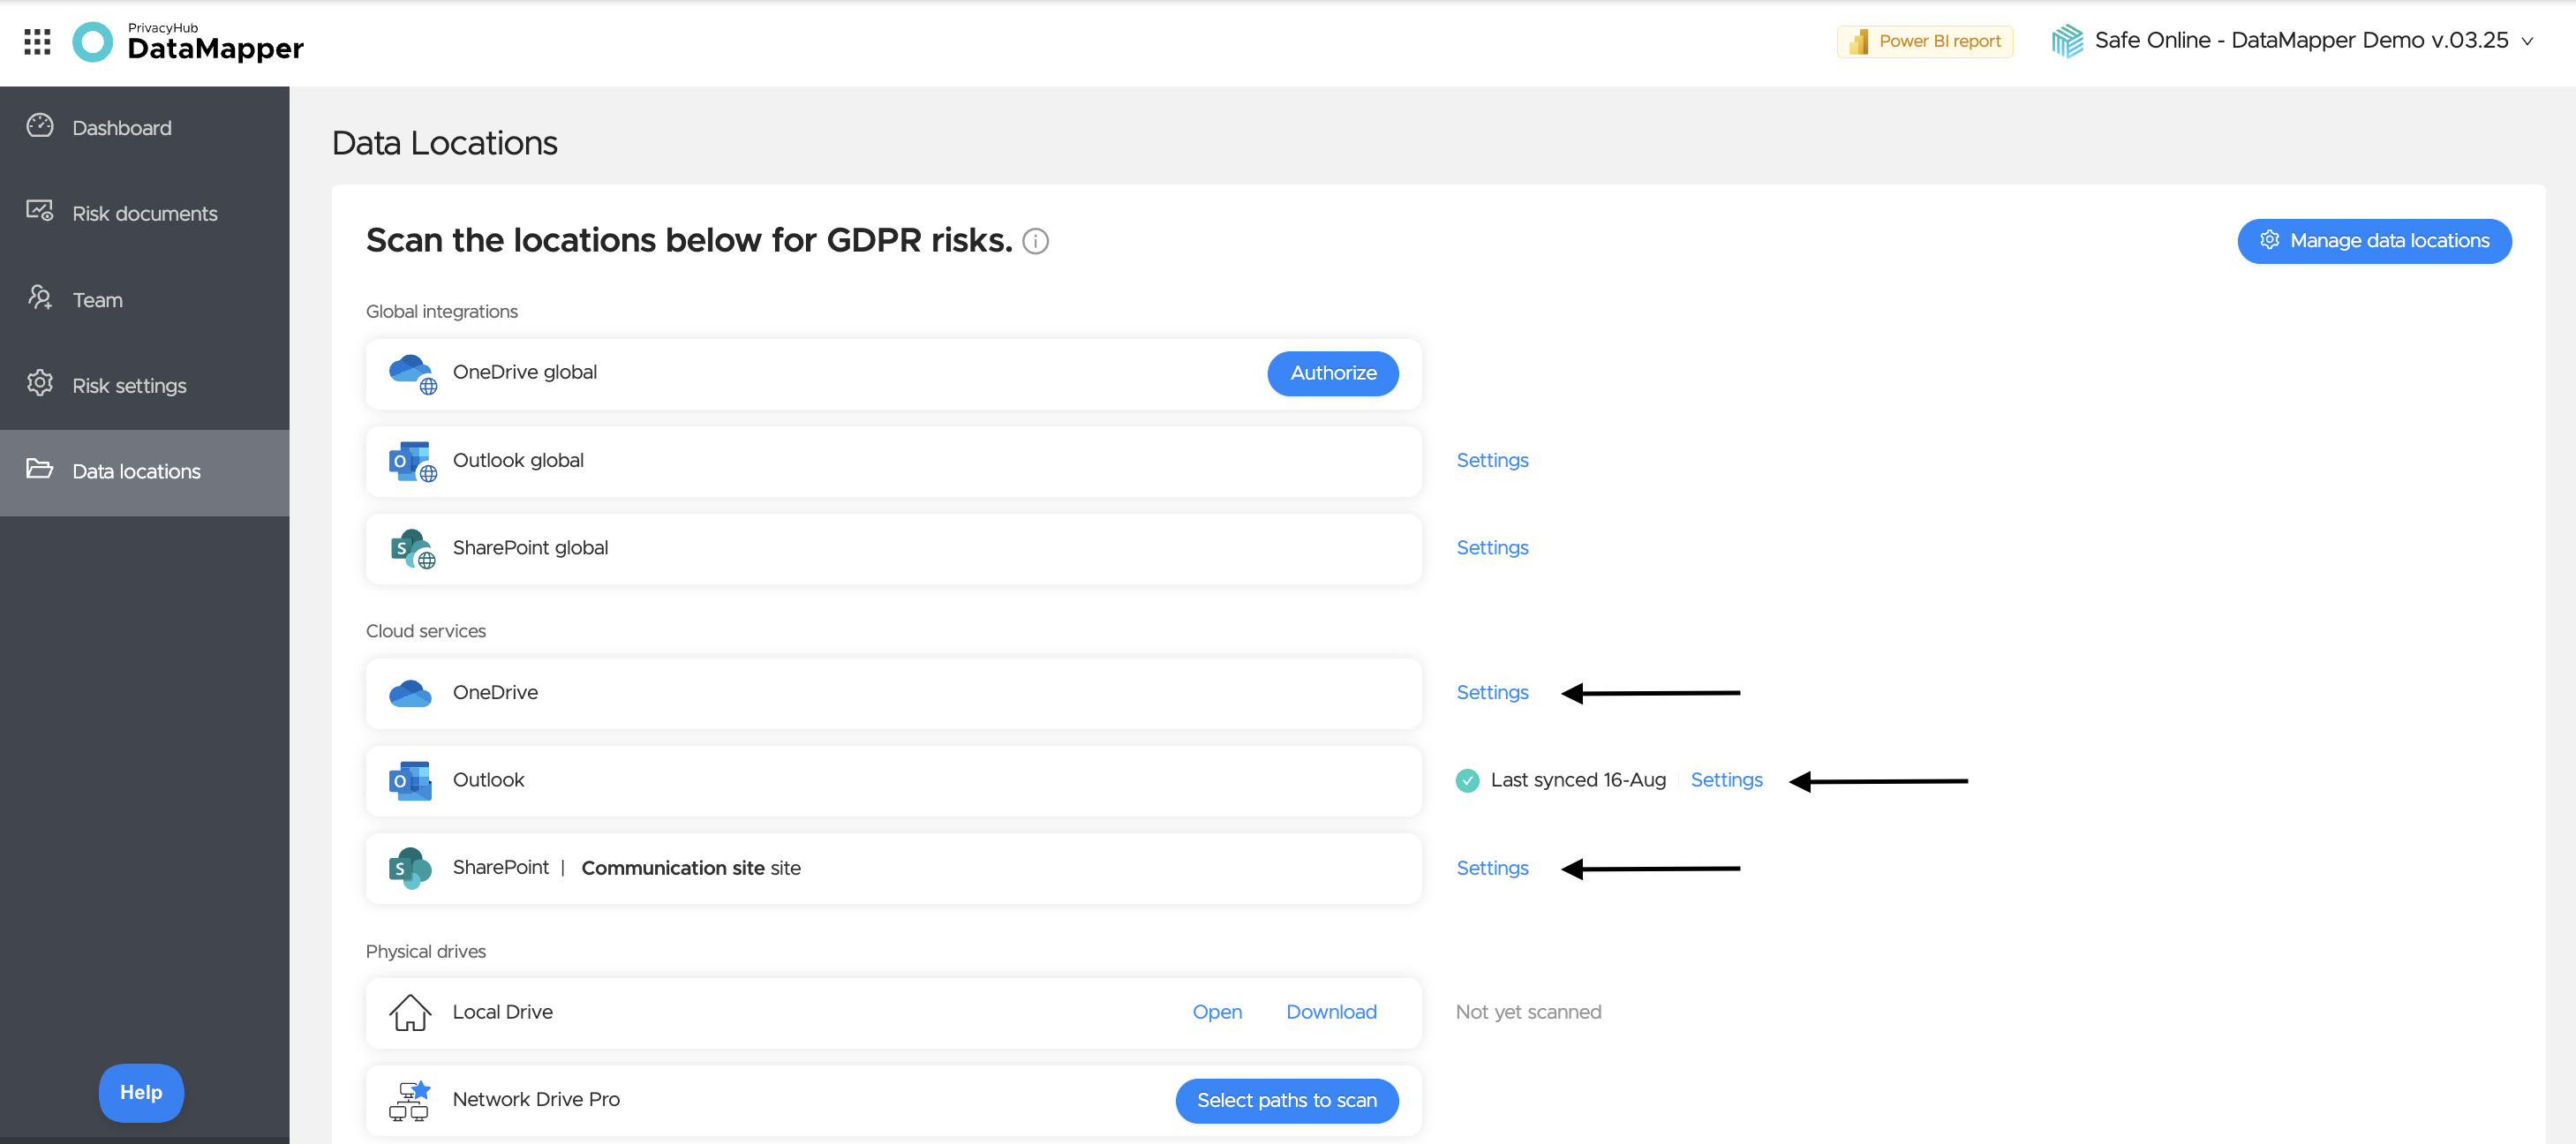
By clicking the Settings button, you'll get a pop-up window as shown below. There you need to check the box for "Delete files" to unlock the functionality. Then Save changes.
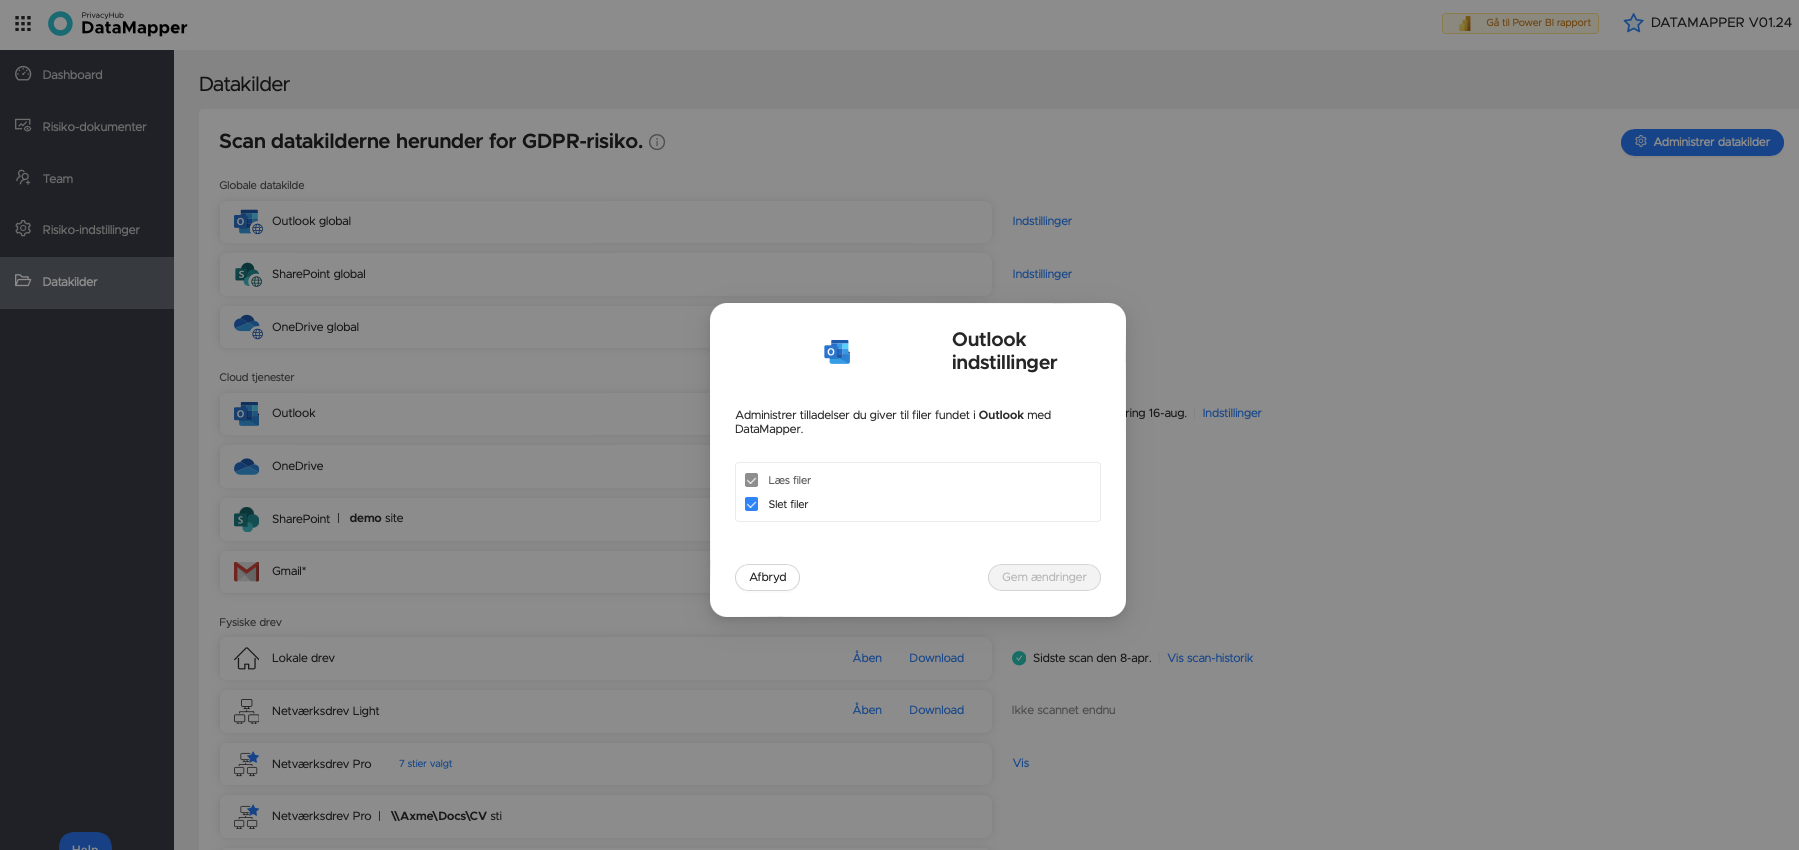
For OneDrive/Sharepoint, repeat the same steps as for Outlook
*Delete function for Sharepoint sites
Sharepoint is a little different from Outlook and Onedrive, as these are often personal accounts, whereas sites are shared sites that can be accessed. Therefore, deletion must be activated on each site that has been scanned in DataMapper and possibly delegated to the user (you can read about this in our Sharepoint guide). Example: if you have 3 Sharepoint sites available in your overview in Data Locations, you need to click on each of them to activate the delete files function.
Once activated, you can proceed to the risk documents page and delete.
Step 3: Select a file and press the "delete" button
Click on Risk Documents in the side menu and then ➡ My Files
Example: We've clicked on the top file in the row - in addition to the usual blue and black buttons, we now have a red Delete button, indicating that we can now delete the file. This will be shown for each of the files you have access to.

If you click the Delete button (Delete or Delete all - depending on whether there are multiple files attached to one email) - you'll get this pop-up message.
You have two options here: go to the document and its source (this opens Outlook and the actual email with the files) and if you click Delete all - you delete the file directly - also from its source in Outlook (or Onedrive or Sharepoint)

This way you can continue your cleanup with all the files found that belong to Outlook, Onedrive or Sharepoint.
At the top under the Deleted menu, you can keep track of how much you've deleted until the overview updates at the next sync 24 hours later.

⁉️ Where do the deleted files end up if I accidentally delete one I wasn't ready to delete?
Your files/emails are deleted completely - and do not end up in the Deleted Items folder you know from Outlook. Instead, they are placed in a "recoverable items folder" that only your email administrator has access to - for a maximum of 30 days after the file is deleted. After that, it is permanently deleted.
You can read more about the recoverable items folder at the link here and how you or your administrator can get access to it.
This only applies to Outlook, however. Onedrive has a log within Onedrive itself where you can see how much you delete, but it's unclear whether the files can then be recovered. Sharepoint does not have the same options.
Do you have more questions? You can write to us via the chat in DataMapper or send us an email at support@safeonline.dk 😊