
How to create user groups in DataMapper - Admin (EN)
This article is a short guide to creating groups for specific users. You can use groups for two purposes:
- Manager oversight: create a group so a manager gets a limited dashboard scoped to that group's members, letting them track the group's risk development over time — both new risk from added files and improvement from cleanup.
- Shared cleanup: create a group, so that group owners can get an overview of, and clean up files across, a set of accounts added to that group. This is useful for departments with shared mailboxes that have different owners.
It only takes 4 steps:
Step 1: Log in to DataMapper
Step 2: Set Group Settings before creating groups
Step 4: Manage your groups over time
Step 1: Log in to DataMapper
- Make sure you are signed in as Admin and have access to
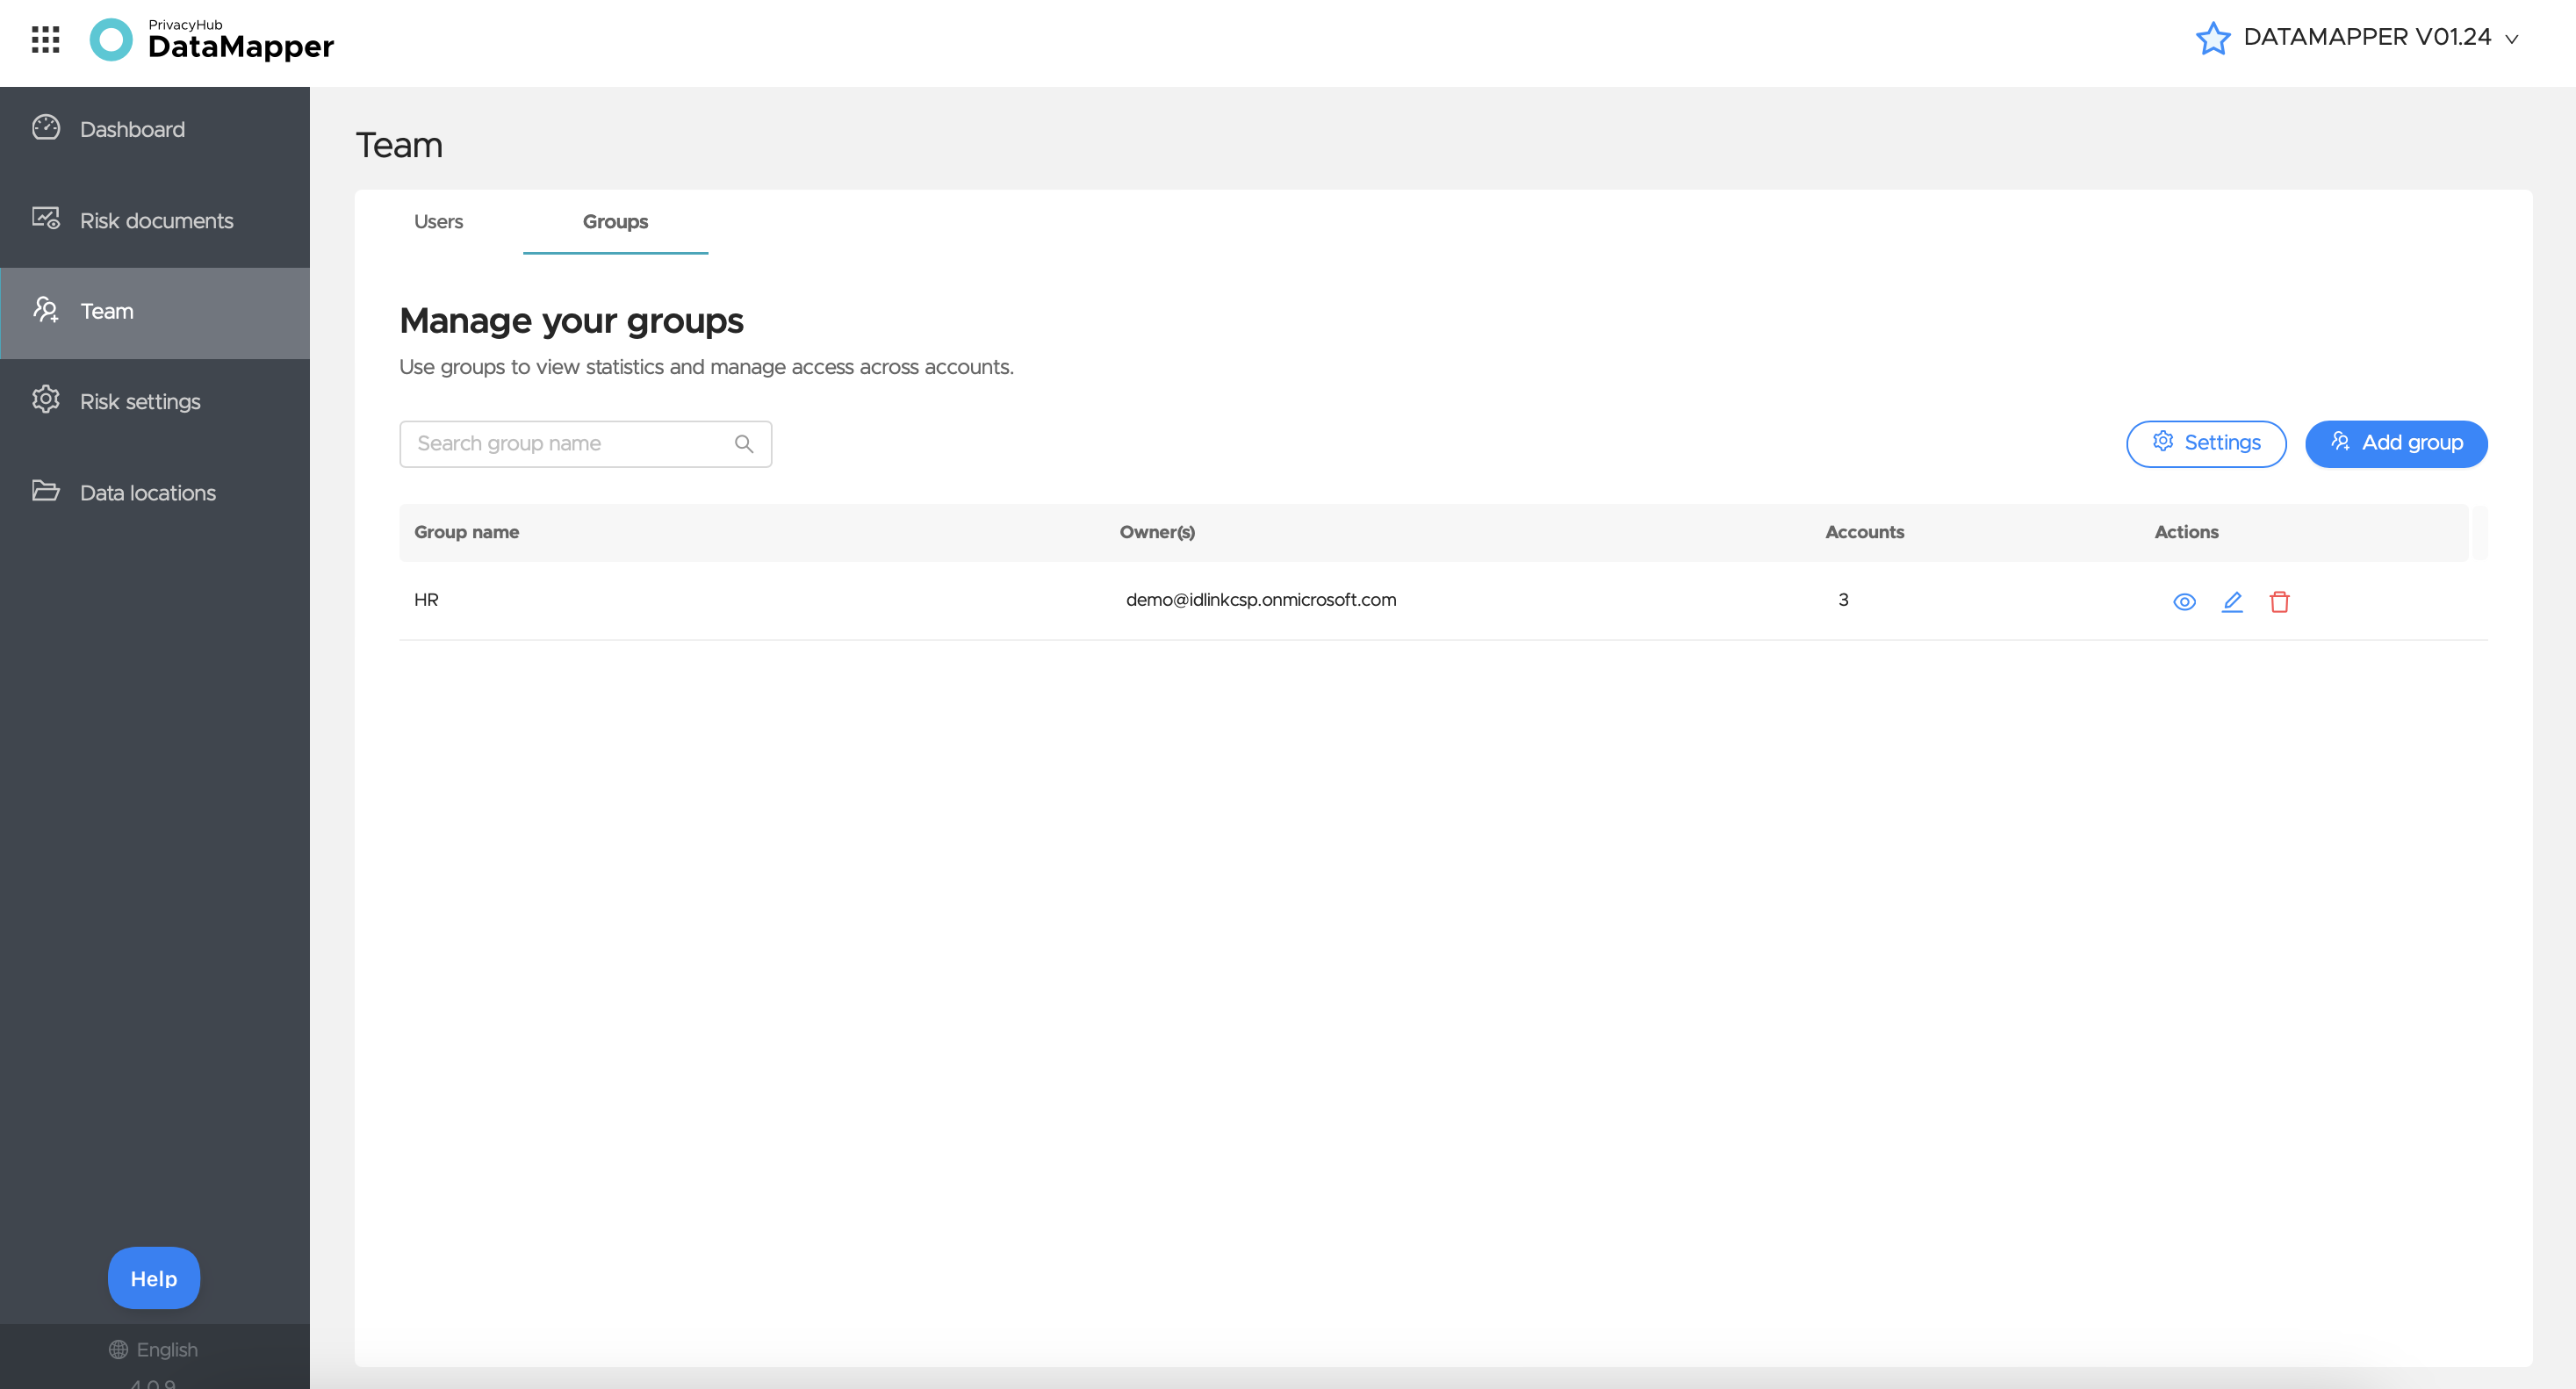
- From Team - click on Groups
- Go to either Settings or Add Group
- From the Groups section, you can access, edit, and delete existing groups
Step 2: Set Group Settings before creating groups
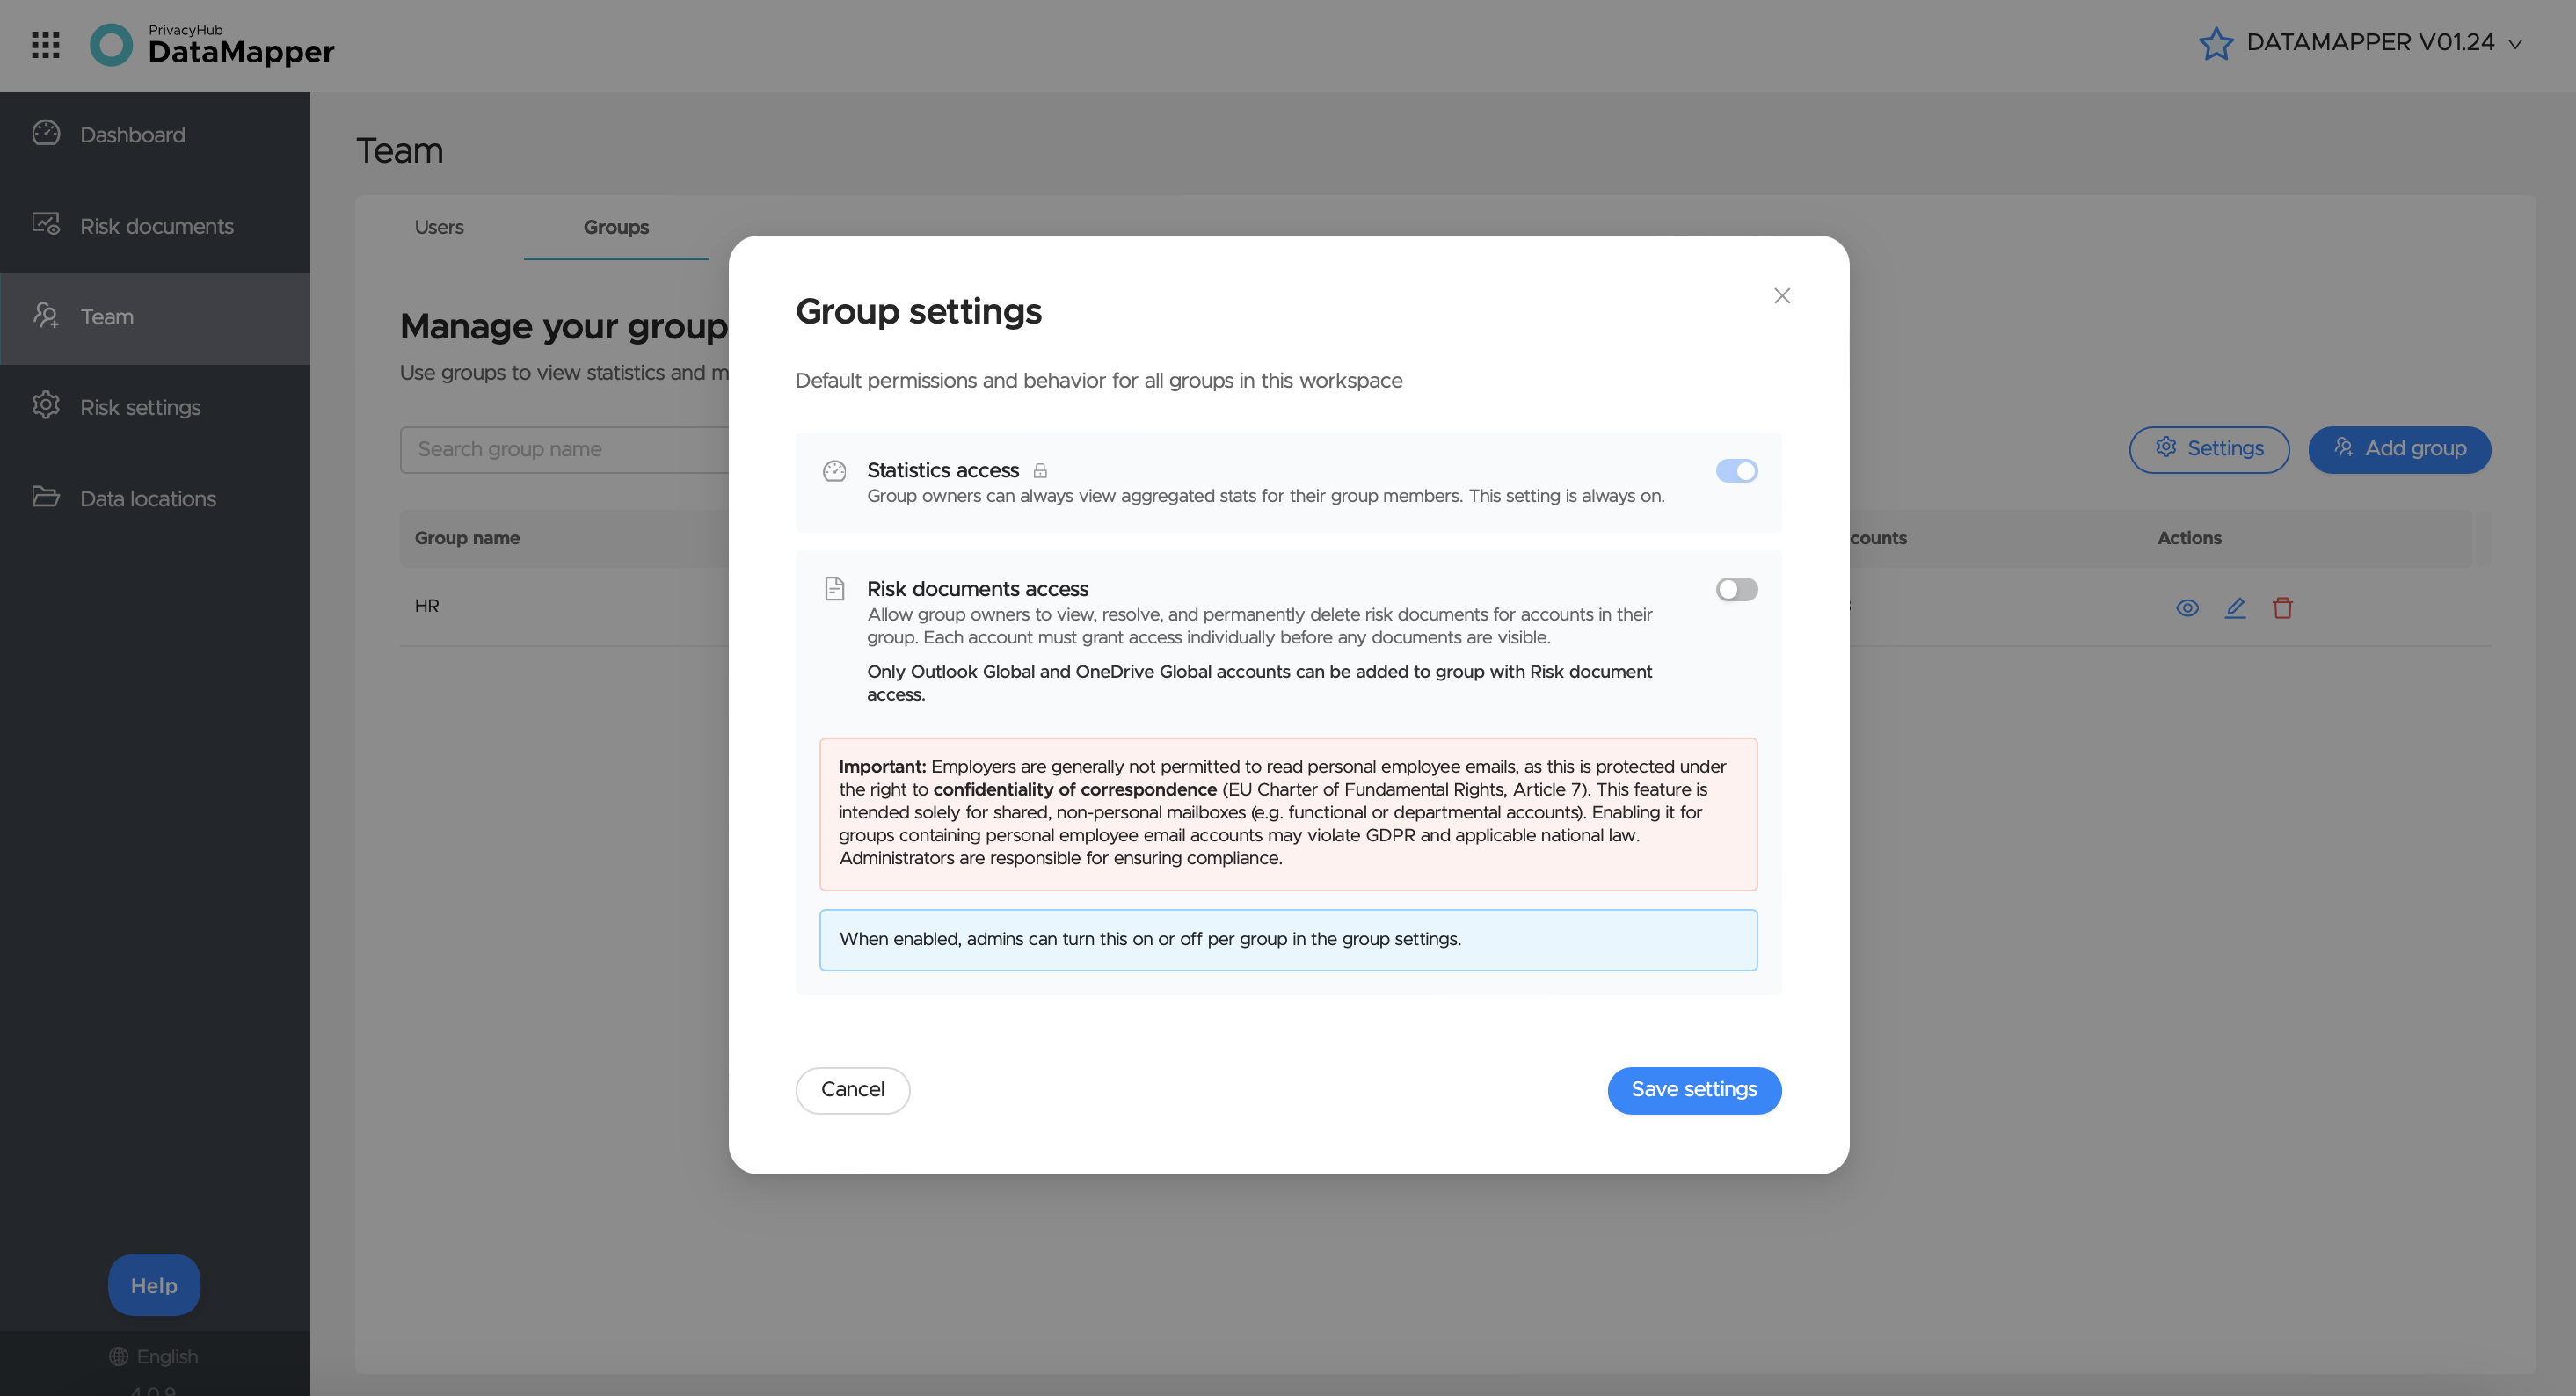
- Check the group settings before creating your (first) group
- By default, statistics access is always turned on, since this is the core idea behind using groups
- Set Risk documents access to on if you wish to be able to clean up risk documents in groups (be aware of the important message)
❗️Adding risk documents to groups allows group owners to view, resolve, and permanently delete files for accounts in their group
❗️Each account must individually grant access before the group owner can use this feature — simply turning it on here isn't enough
- Click Save Settings and move to Add group
Step 3: Add group
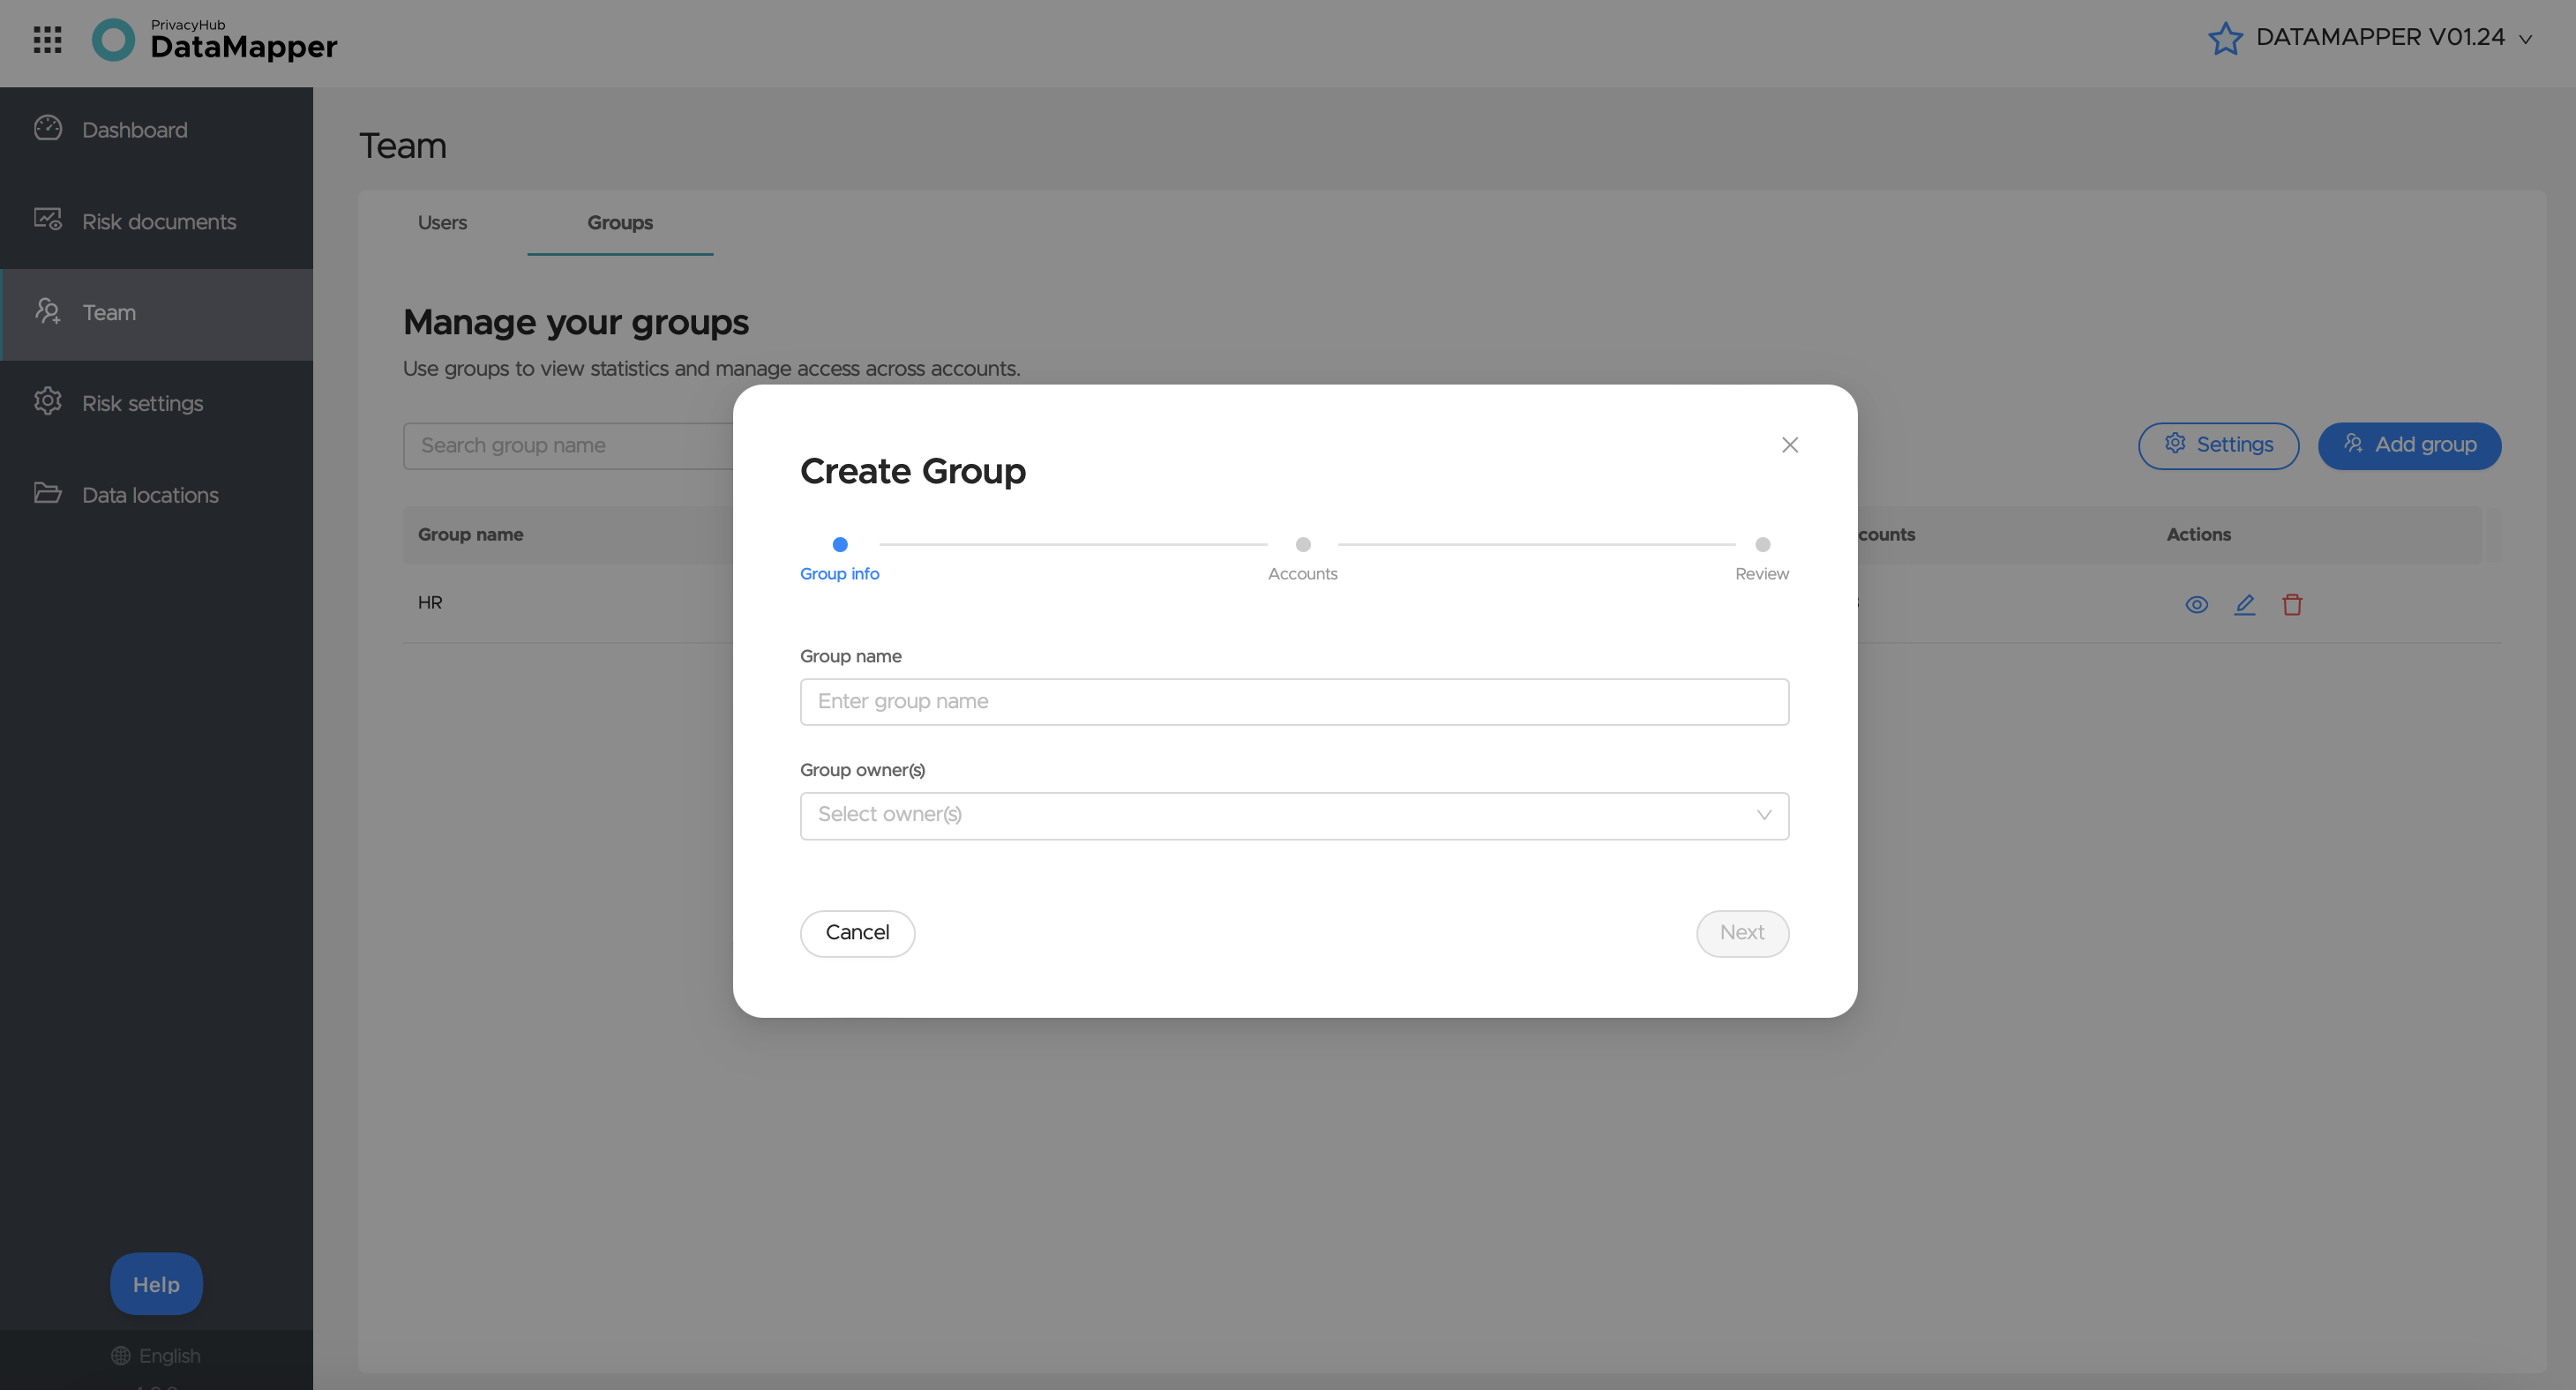
- Click add group and follow the steps
- Give the group a name - click next
- Add one or more group owners - click next
- Choose the accounts to be included in the group - click next
- Review your group
- End on "Create group"
- Congrats! You've created a group – repeat as many times as you like for however many groups you want to create
Step 4: Manage your groups over time
Once groups are created, it's highly likely you'll want to manage them over time rather than repeating the whole flow for each group.
- Go to "Permissions" when looking at the table of your groups
- Click on the "eye" icon
- See who the owners are
- See which accounts are added
- Resend an email to specific accounts if risk documents access hasn't been granted yet
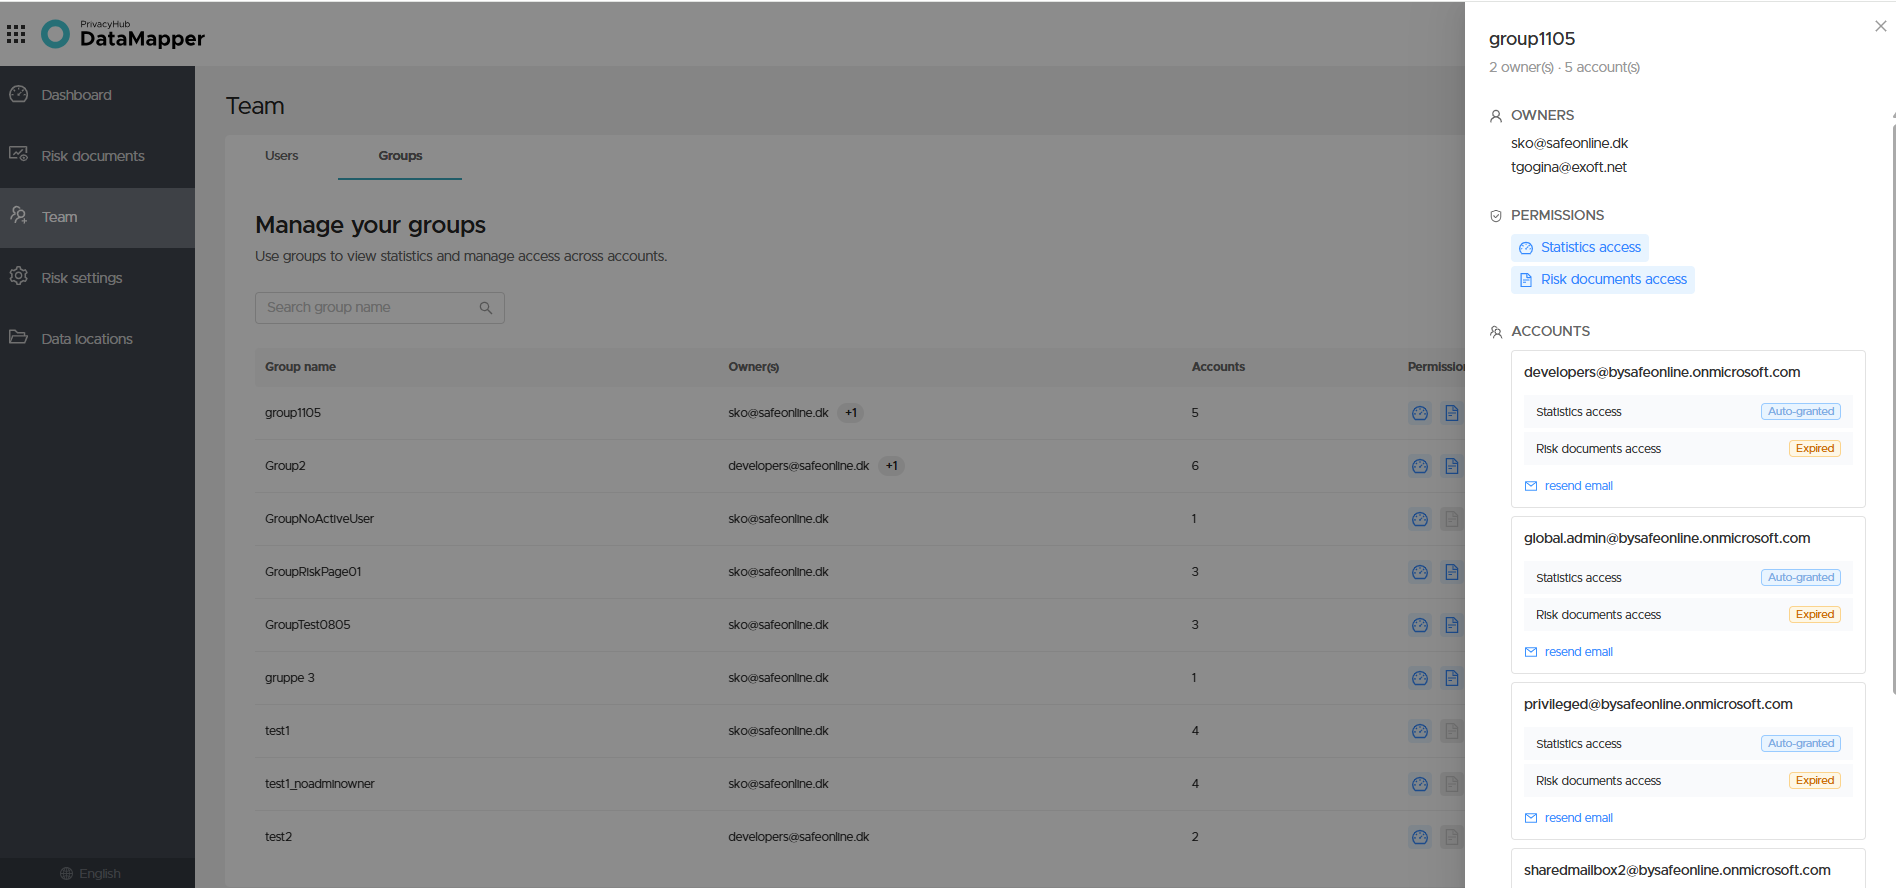
- Click on the top right corner to exit the overview of the group
- Use the "pen" icon to edit the group's name, group owners, or other accounts
- Repeat for all groups as you wish
Do you have any questions? You can write to us via the chat in DataMapper, reach out to our Customer Success team, or send us an email at support@safeonline.dk 😊