
1.1 Getting started with DataMapper: Admin English ✔
DataMapper is a tool that makes it easier for you and your organization to get an overview of your data, which may potentially be sensitive and at GDPR risk.
The following guide assumes that it is the administrator who is logged into DataMapper.
It only takes 5 steps to get started:
- Log in to DataMapper from the invitation
- Connect all relevant locations and start scanning
- View statistics on your scanned data
- Find sensitive documents
- Invite more users
1. Log in to DataMapper from the invitation
Accept the invitation from the system and then log in with your email and your password.

Here you have three ways to log in - if it's the first time you're logging in to access onboarding, the screen will say "activate your account".
You have 3 options to log in (if you're a Microsoft user, only the top and bottom options are relevant to you):
- Continue with Microsoft: log in with single sign-on the same way you'd log into your email in a browser. One or two clicks and you're good to go.
- Continue with Google: log in with Google sign-on the same way you would in a browser.
- Another email provider: you can log in with this option and get a one-time code sent to your inbox, if you can't remember your password or the account isn't personal (this is common for shared mailboxes).
2. Connect all relevant locations and start scanning
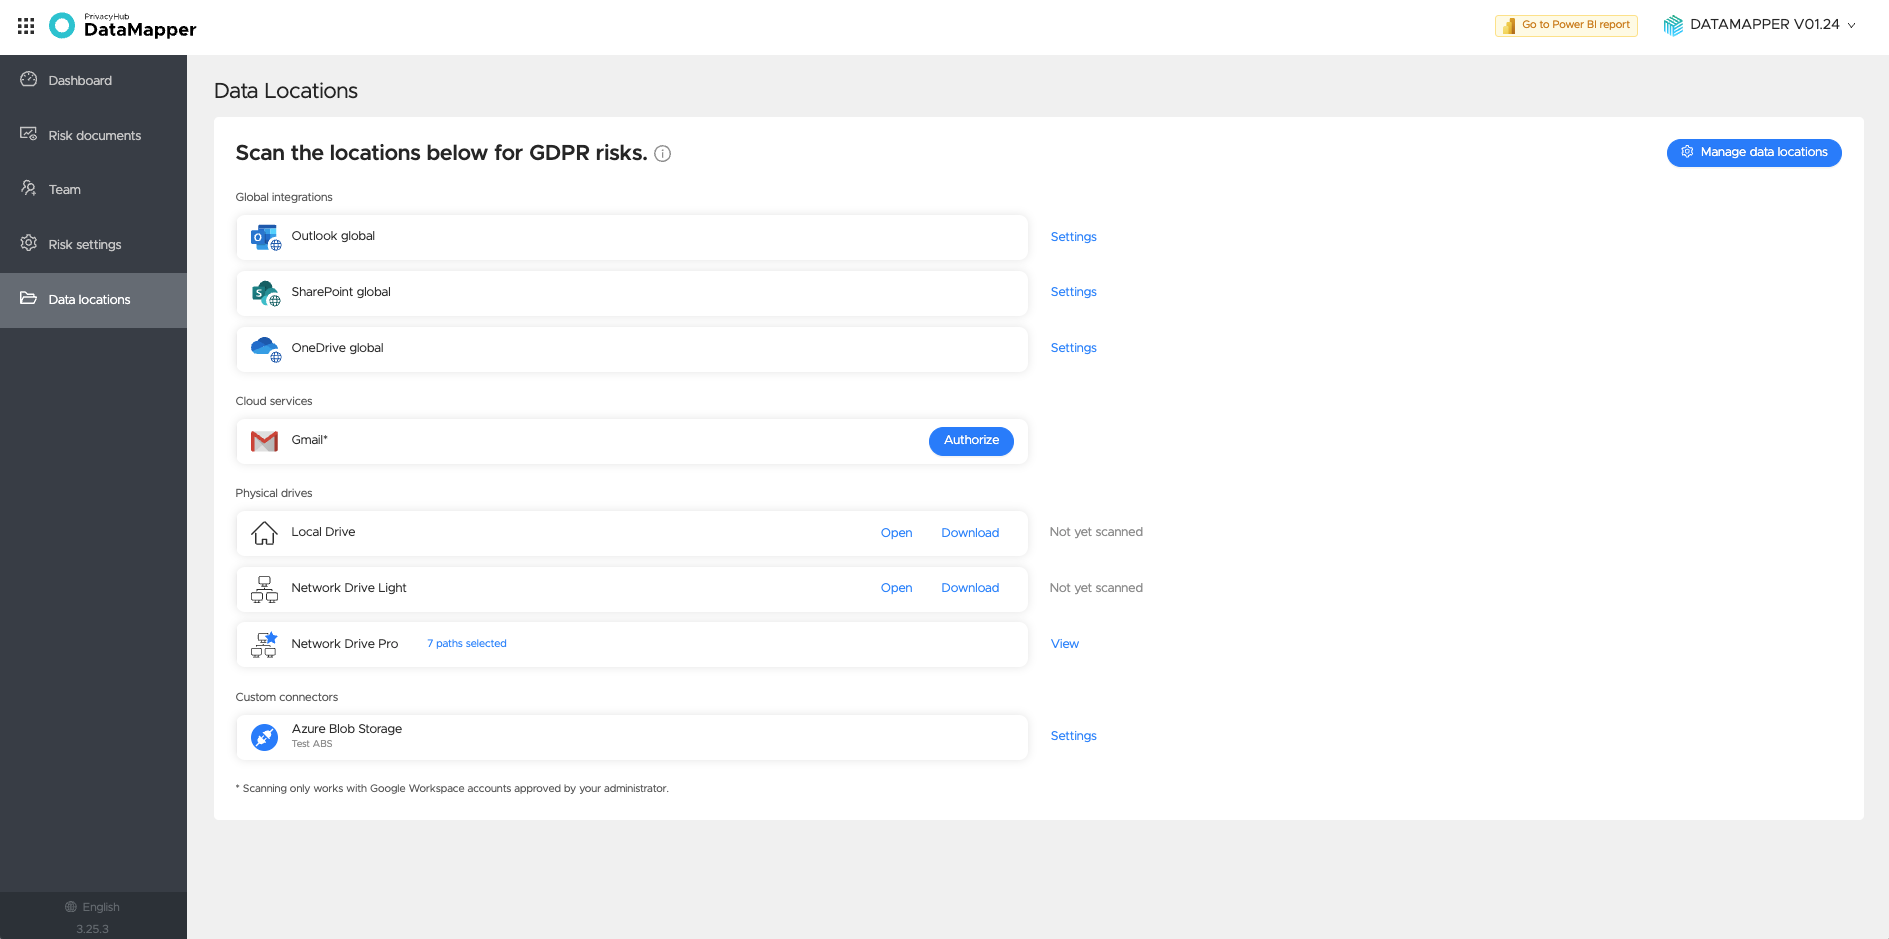
Then choose which locations your organization uses on a daily basis: Outlook global, OneDrive global, SharePoint global, network drives, etc. If you've been added as an extra administrator, you may not need to make any choices.
- Start in Data Locations in the left-hand menu. Authorize the locations selected during onboarding one by one, then start the scan on the selected accounts (Global scan only). Repeat for each location.
- The system will then start scanning, then synchronize and send the data over to DataMapper.
You'll start on Data Locations every time you log in going forward:
3. View statistics on your scanned data
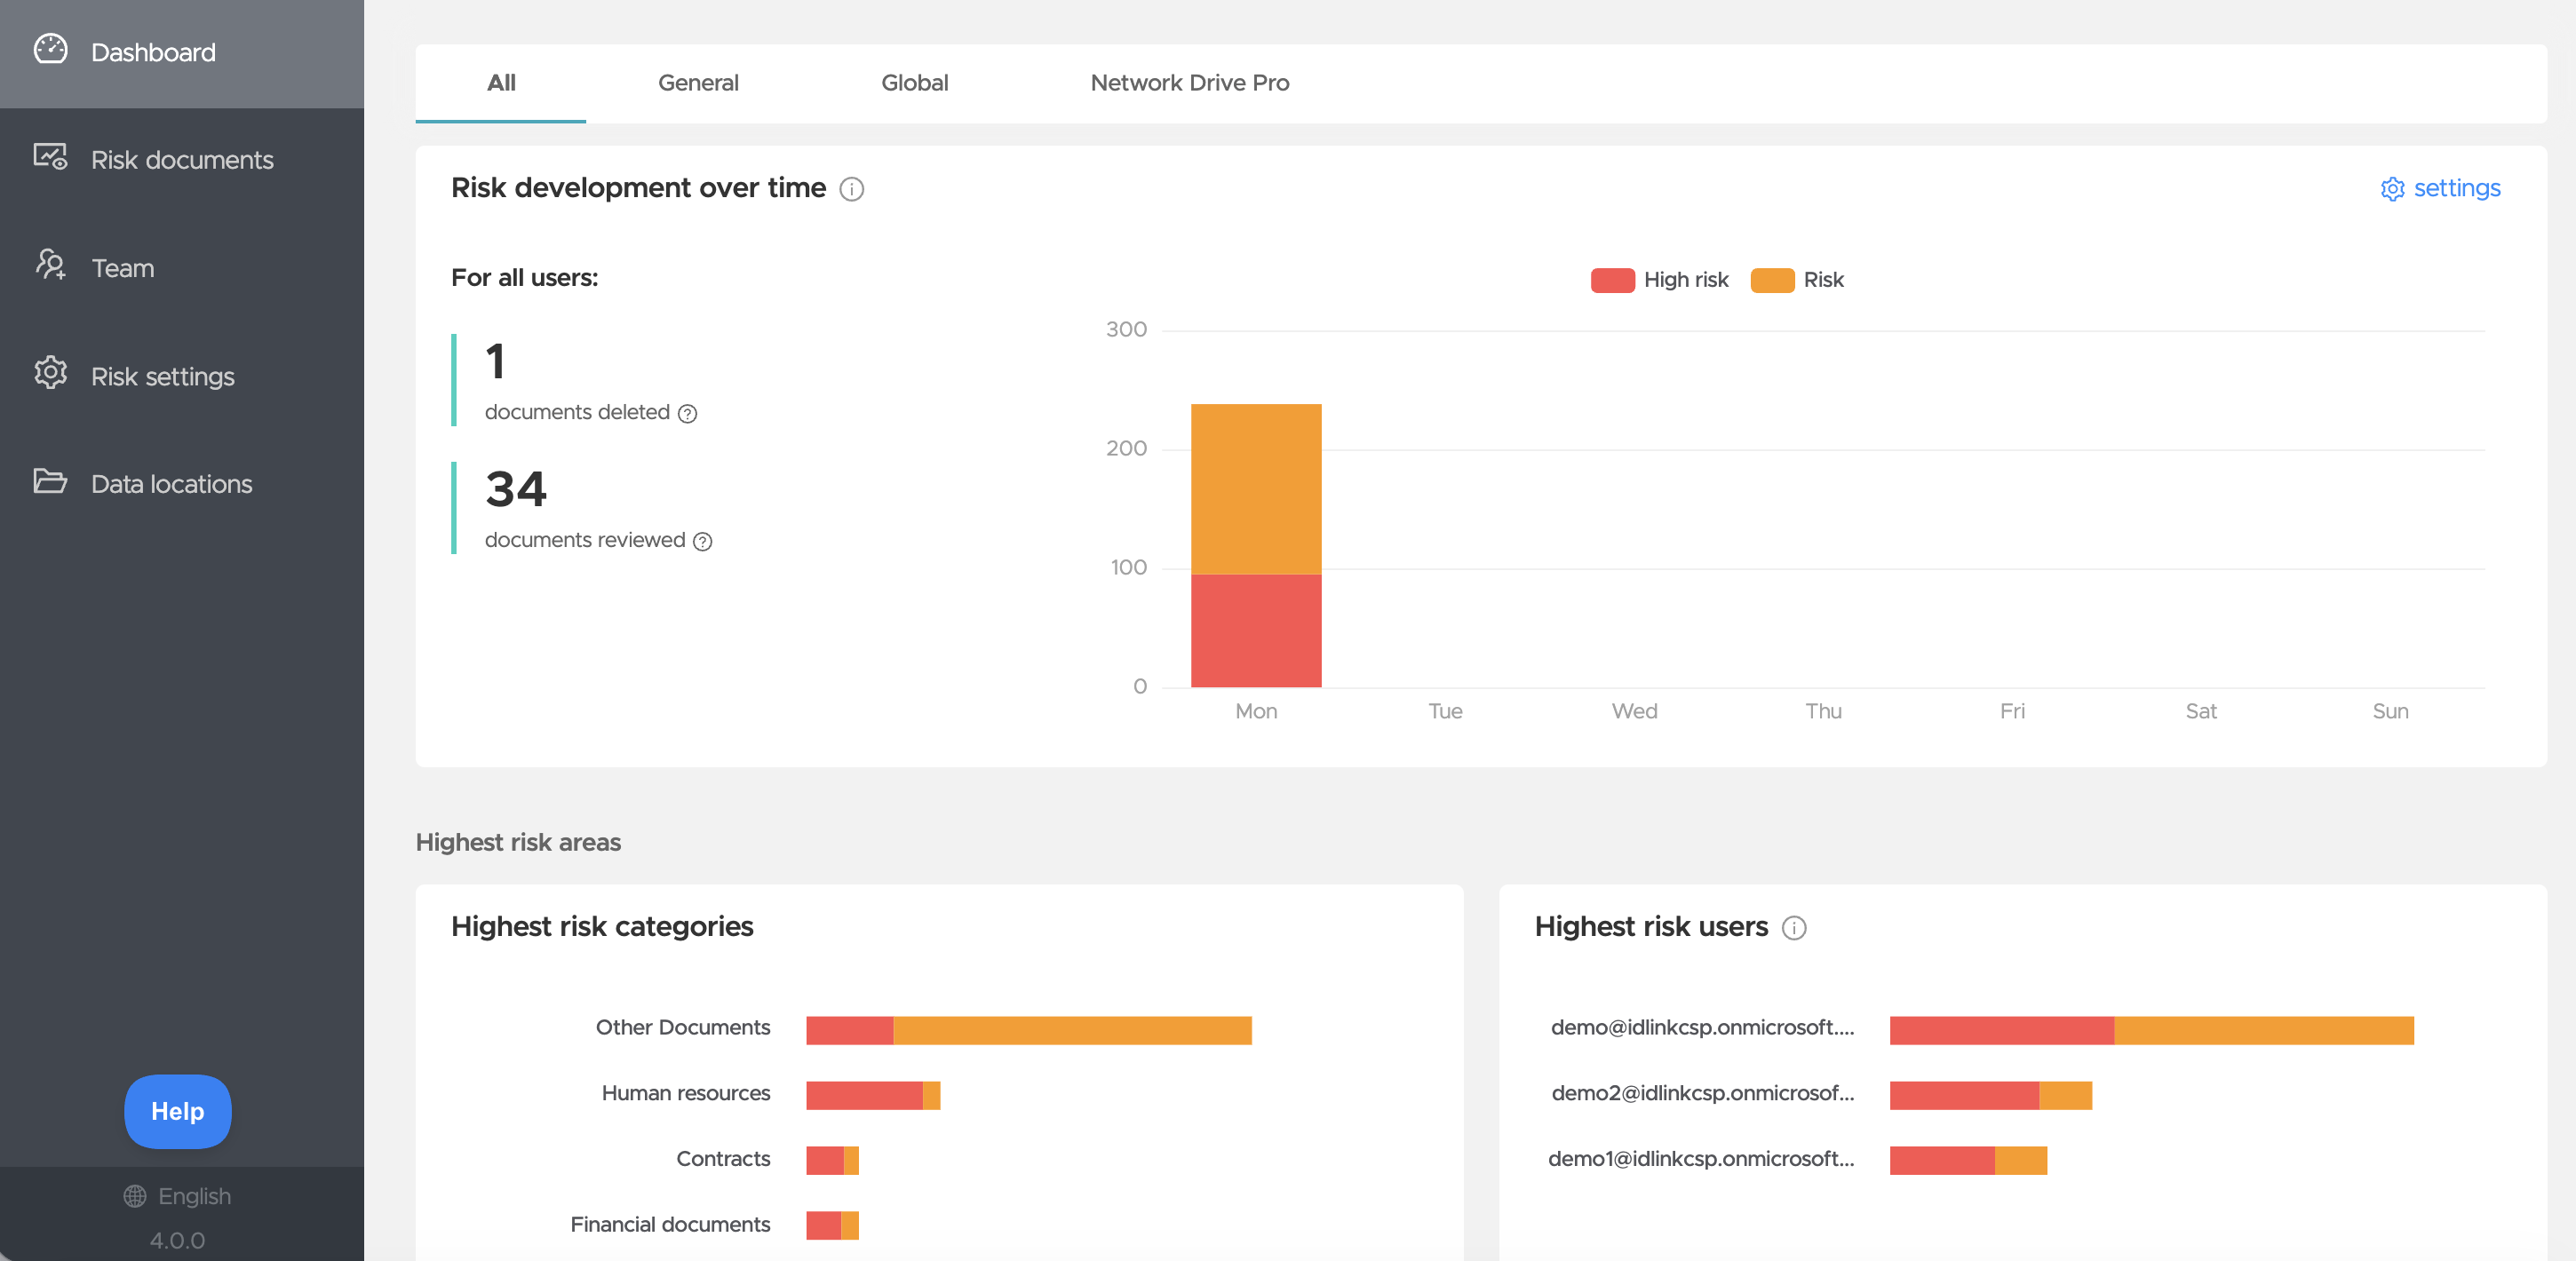
Get an overview of your users' cleanup progress in the "Risk development over time" graph, see how many high-risk, risk, and low-risk documents you have in total across your organization, view the risk categories, and see other statistics using the Dashboard.
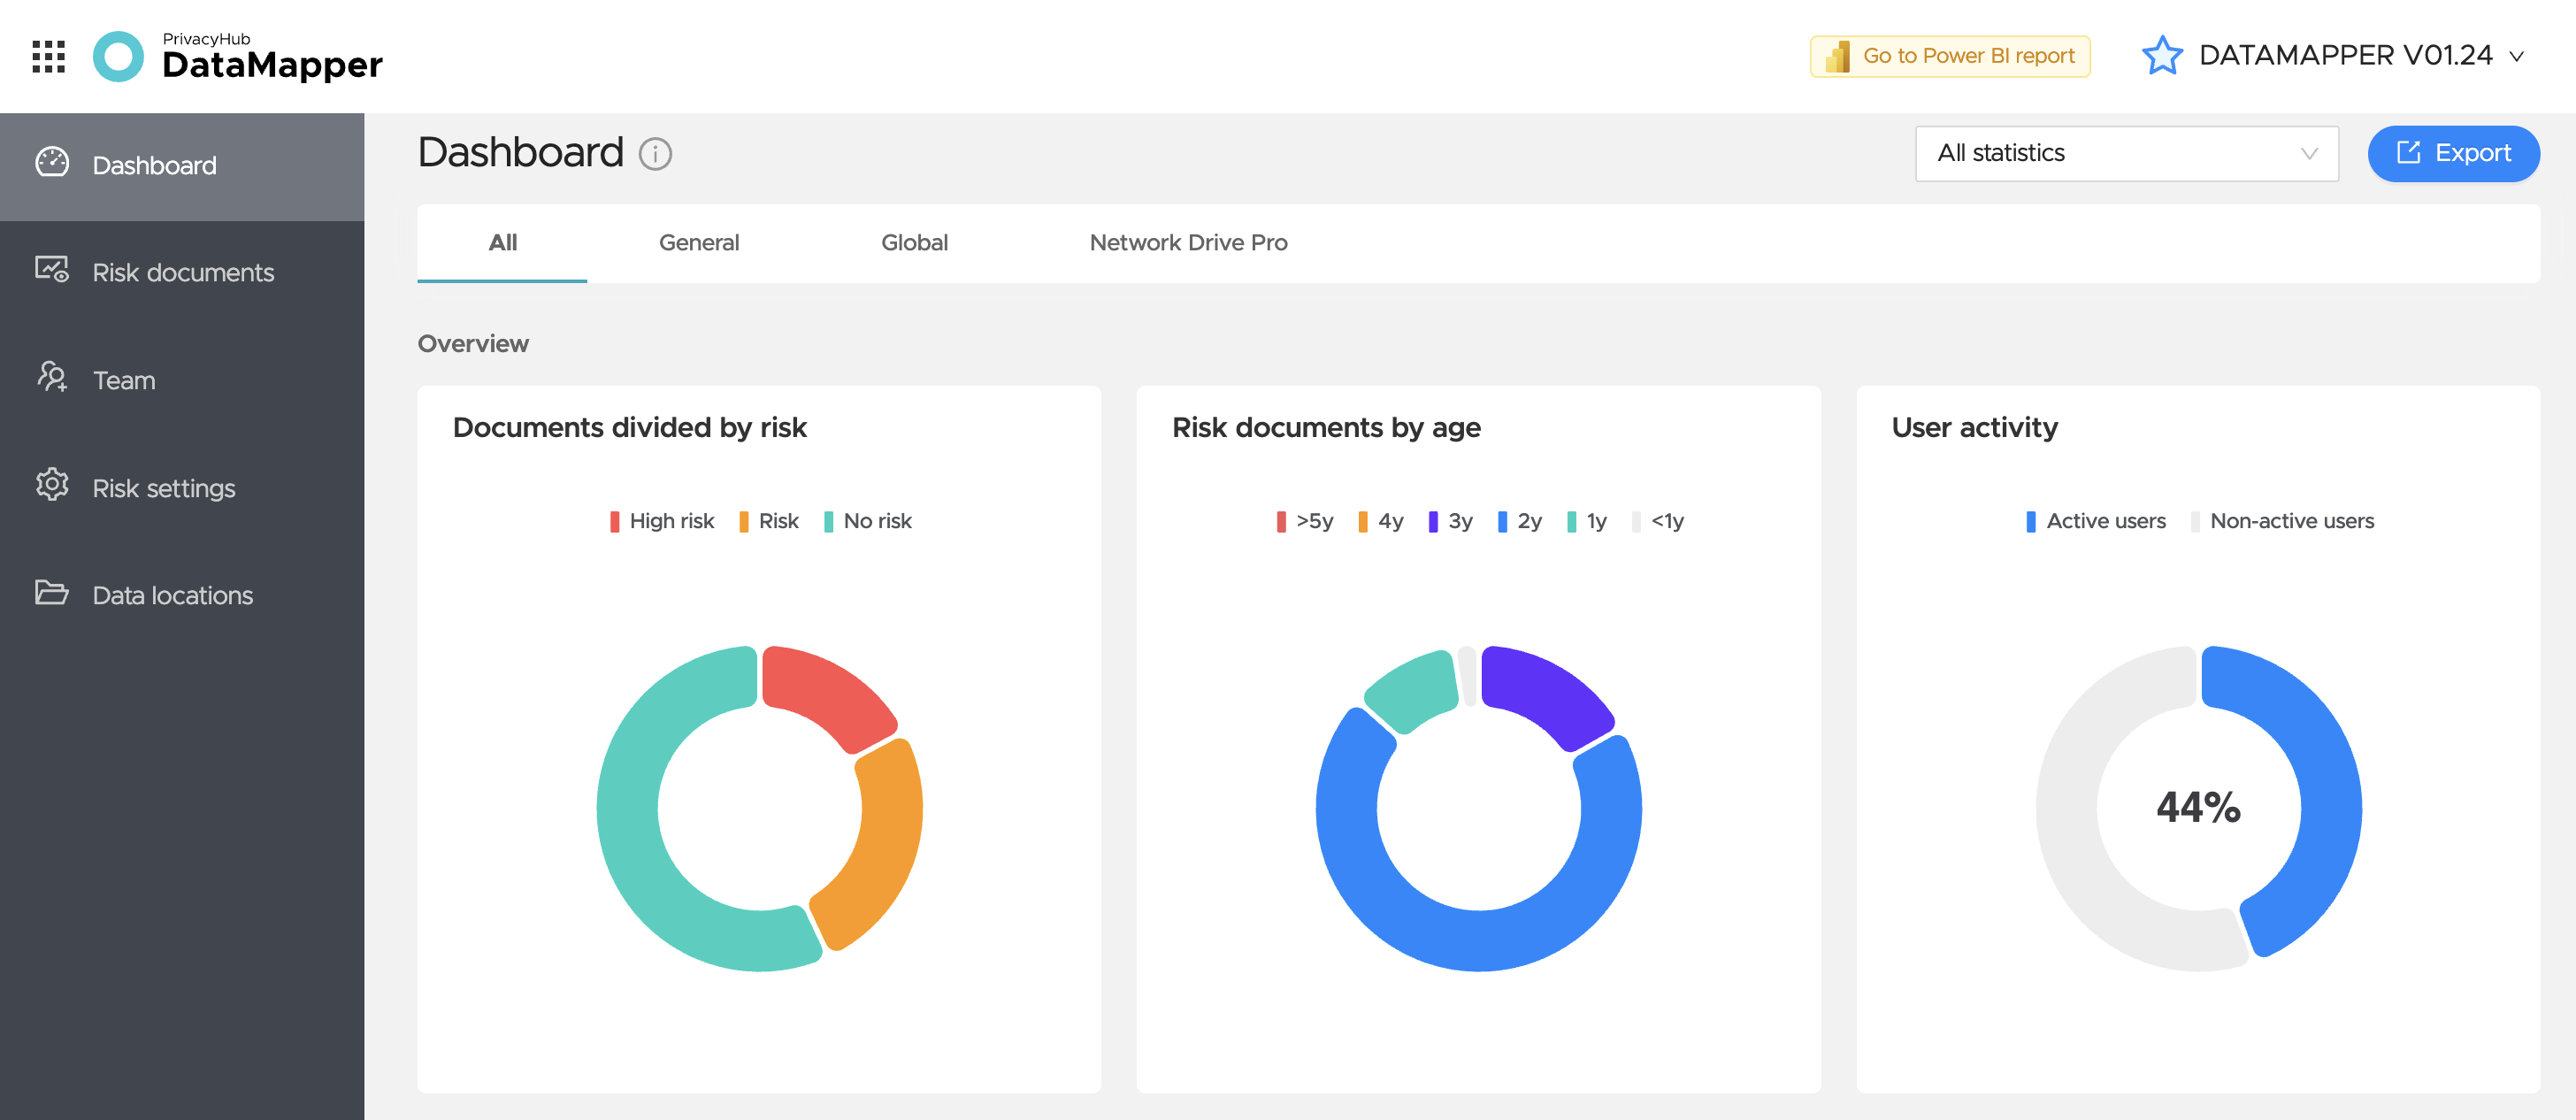
- Click Dashboard at the top of the left-hand menu to get an overview of your data via the dashboard
- Once your data has been scanned, you can see how many high-risk, risk, and low-risk documents you have in total across your organization by clicking on General
- In General, you can find information about your progress in reducing risk. The newest feature is "Risk development over time", which can help you keep track of users and how often they clean up, and how much data gets deleted.
- Review the risk categories, and use them for internal reporting if needed.
- By going to Global, you can see the highest-risk accounts from here and make sure they receive an invitation to use DataMapper.
4. Find sensitive documents
- Click "Risk documents" in the menu
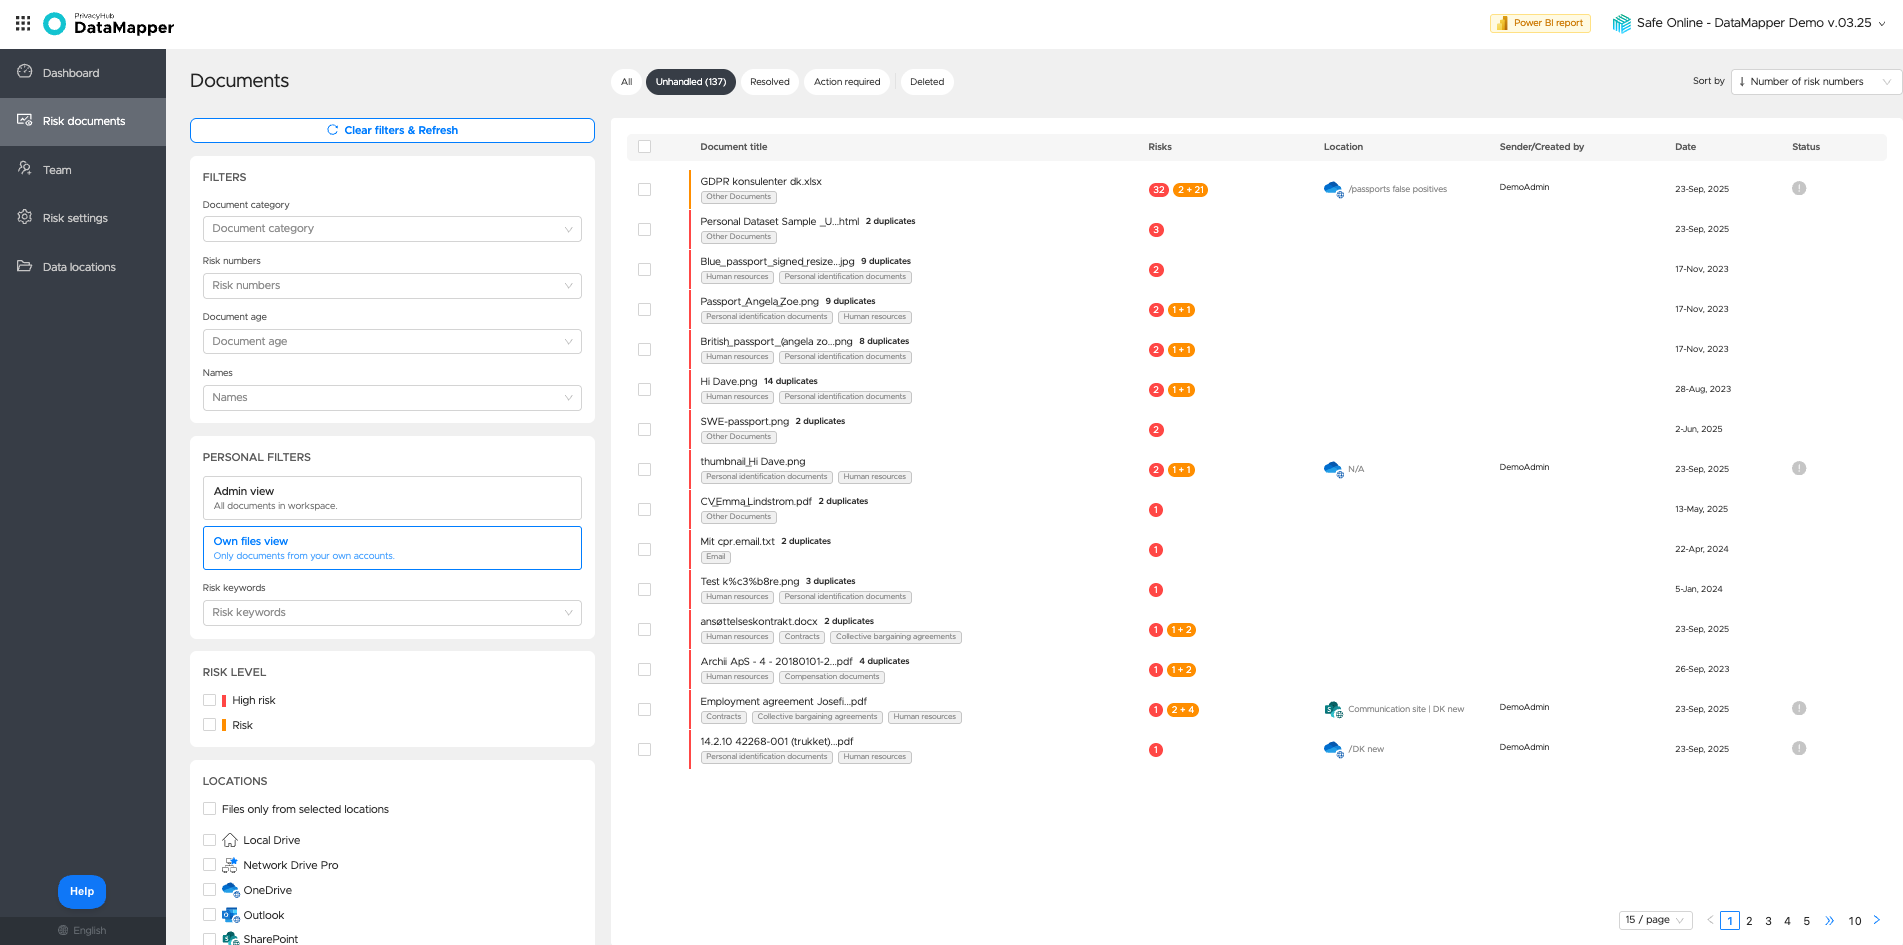
- Use the filters to sort the documents by adjusting document type, name, keywords, etc.
- Make sure you've selected "Own files view" if you want to clean up your own documents - DataMapper is automatically set to the "Admin files" setting, which gives you an overview of users' data in a narrower view.
- Then click on a specific document in the overview to see why it was flagged in the scan - DataMapper highlights the Risk level, whether it's High risk or Risk (numbers or keywords).
- Here you can take action and delete a document via DataMapper, or simply mark it as Action required. Choose between: Resolved, Action required, or Delete
As a starting point, we recommend starting with High-risk documents, since these files are often easier to review based on numbers and document age, whereas risk files (keywords) may require a bit more time to work through.
- Delete the files: Before you can delete files in DataMapper so that they're also deleted in Outlook, you need to enable the feature under Data Locations - Outlook - Settings (see more here: How to delete in DataMapper. Then you can quickly and easily clean up your files!
The Dashboard page and the Risk documents page for admins are updated regularly.
When you select Admin view, GDPR regulations mean you won't be able to see all the details of documents containing sensitive content. You'll only see an overview of the documents and can ask your employees to start cleaning up their documents that contain sensitive data.

5. Invite more users
❗Only regular scans can invite via the Team page; all Global scans must invite via the Dashboard.
- Go to Dashboard ➡ Global ➡ View all
- Click "Invite" next to each of the accounts you want to invite to be a user in DataMapper
- Repeat for each account
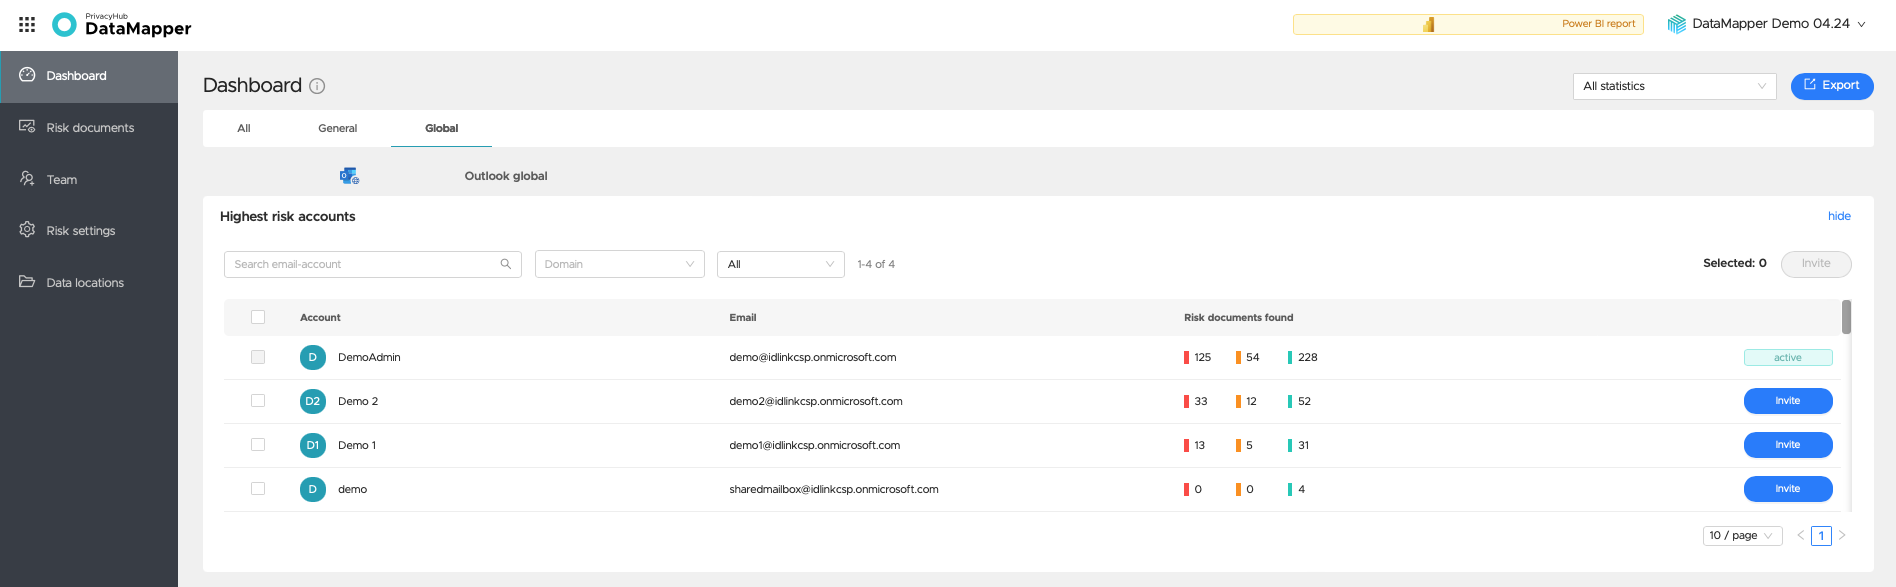
If multiple locations have been scanned and users need access to all the data at once - the invitation should be sent from one location, and for each following location you should click "include data" instead.
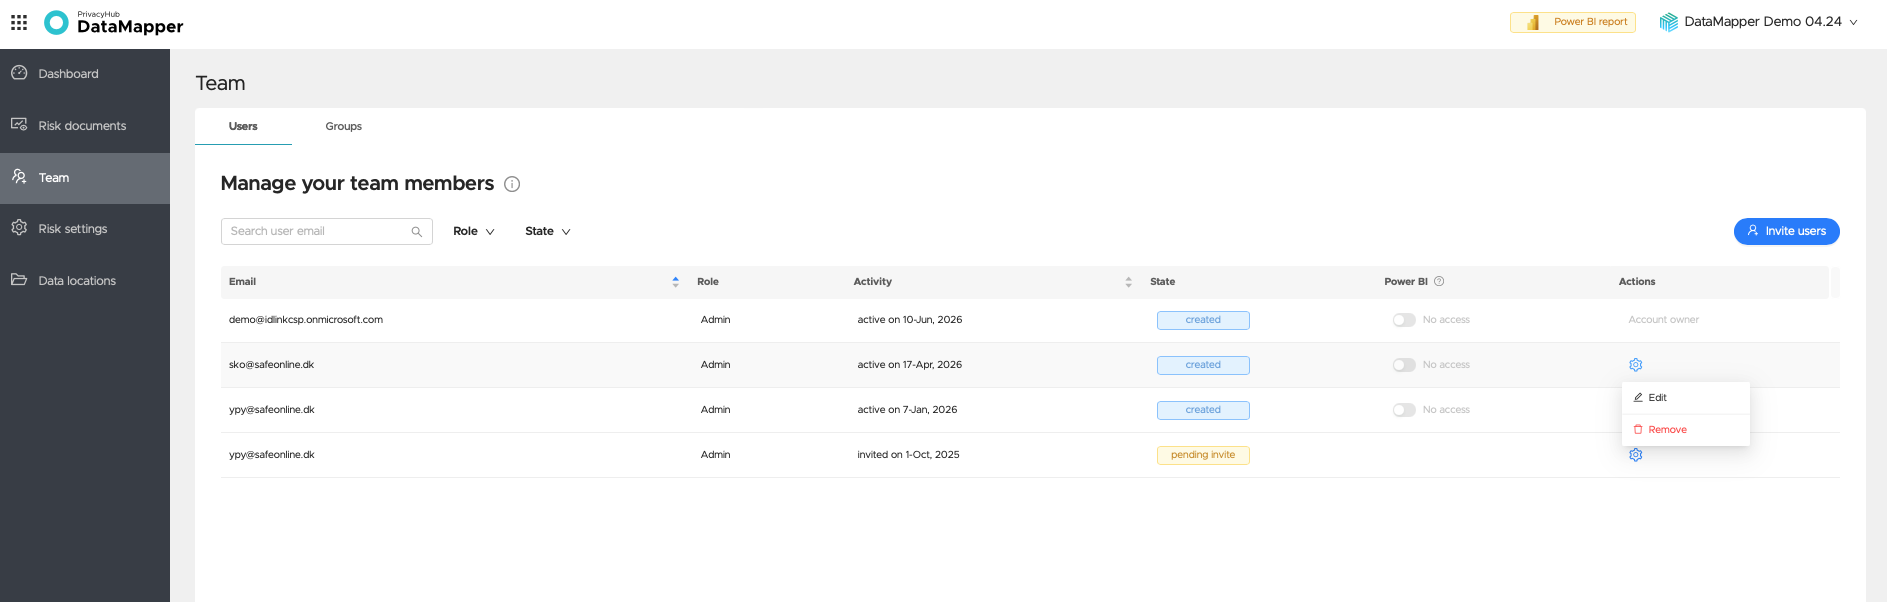
- Go to the Team page to see an overview of who's been invited and who has accepted the invitation. You can also edit user accounts - if a user needs to be changed to admin or removed entirely, that can be done here. Click the gear icon at the far right and select "Edit".
Do you have any questions? You can write to us via the chat in DataMapper, to our Customer Success team, or send us an email at support@safeonline.dk 😊