
User - 1. Getting started with DataMapper
Have you received an invitation to DataMapper from Safe Online, but never heard of it before? DataMapper scans your Microsoft Outlook, Onedrive or Sharepoint and helps to find and manage sensitive data to comply with GDPR rules and regulations. Your administrator has invited you to review and handle your own files.
It only takes 4 steps to get started:
- Step 1: Activate your account in DataMapper
- Step 2: Getting started with DataMapper
- Step 3: Overview of your data sources
- Step 4: Find and delete sensitive documents
Step 1: Activate your account in DataMapper
- Go to your email inbox and find a DataMapper invitation - remember to check your spam/junk folders
- Click the DataMapper invitation link (it looks like the one shown below).
- Log in to DataMapper with your email and the corresponding code, and follow the few steps to get started

Login options on the screen below:
When you click the invitation above to log in to DataMapper, you'll typically see the screen shown below.
There you have 3 options for logging in (if you're a Microsoft user, only the top and bottom options are relevant to you):
- Continue with Microsoft: log in with single sign-on, the same way you'd log in to your email in a browser.
- Continue with Google: log in with Google sign-on, the same way you'd log in in a browser.
- Another email provider: you can log in with this option and receive a one-time code in your inbox, so you don't have to reset your regular password if you've forgotten it (via single sign-on). Logging in this way requires you to enter your email - or the email account you want to log in with - and then click "send code". We recommend using this option for, for example, shared mailboxes.

Once you're logged in, you'll reach the next screen, shown below. From there, continue as instructed by the system. This only applies the first time you log in.
Step 2: Getting started with DataMapper
Once you are logged in, your DataMapper setup begins.
Screen 1. Getting started with DataMapper

Once you've entered your email and code on the Getting started with DataMapper screen, simply click "Next" in the top right corner.
Screen 2: Privacy and consent
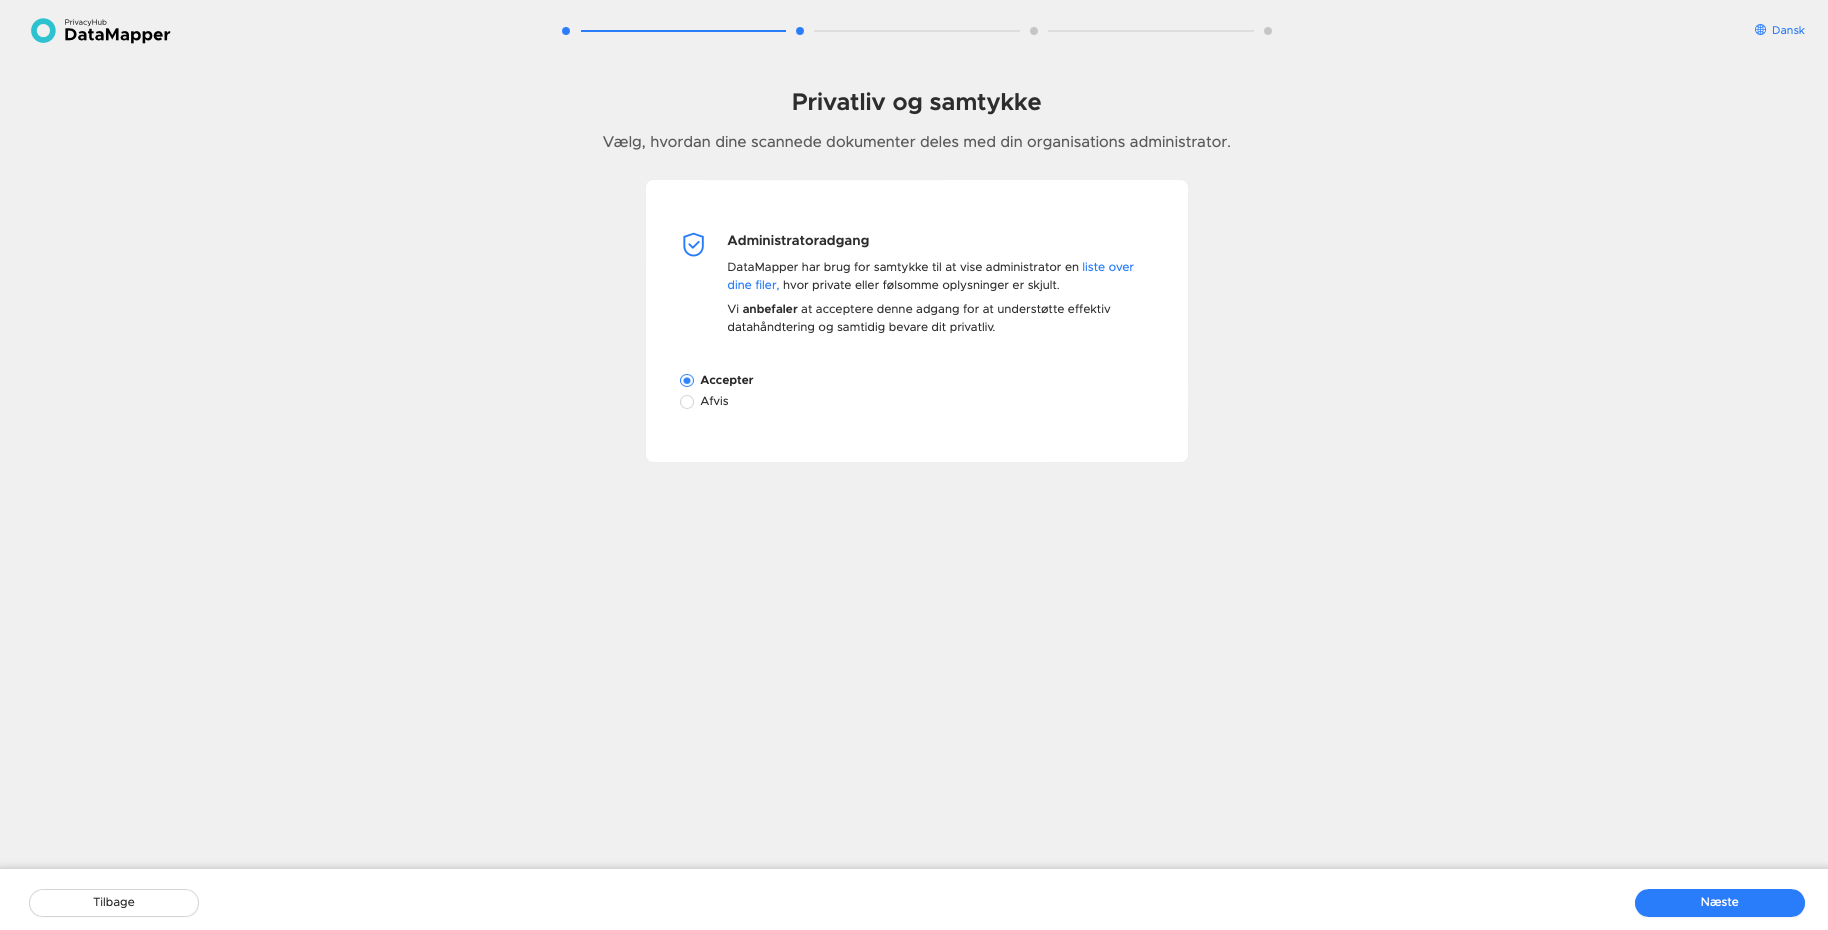
Now you need to specify whether your administrator should have access to view your files - or whether you want to keep them completely hidden. By clicking "Accept" you allow your administrator to follow your ongoing cleanup, but no sensitive content will be shown. Click "list of your files" to see an example of what this will look like - before clicking Next. Read more here.
Screen 3. Scanning cloud data sources
Once you've clicked "Next" after making a choice above, you'll be presented with the data sources available for scanning, provided they haven't already been selected by your administrator. If that is the case, you can skip this step and go straight to starting your cleanup.
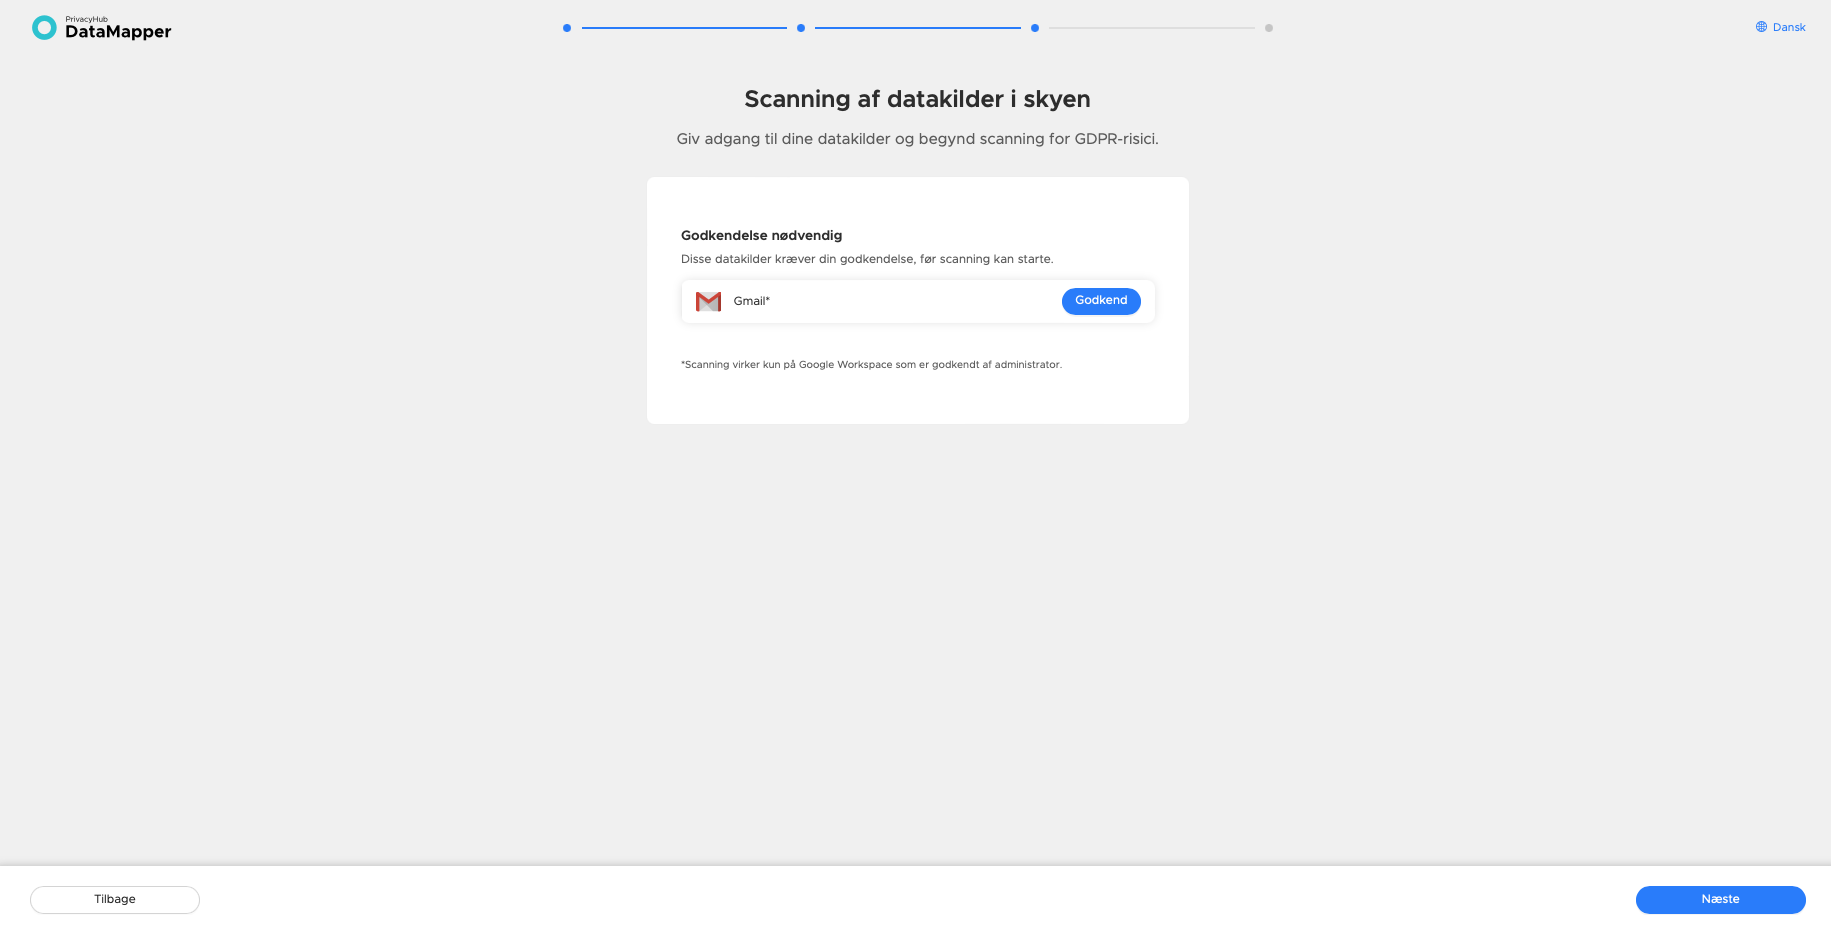
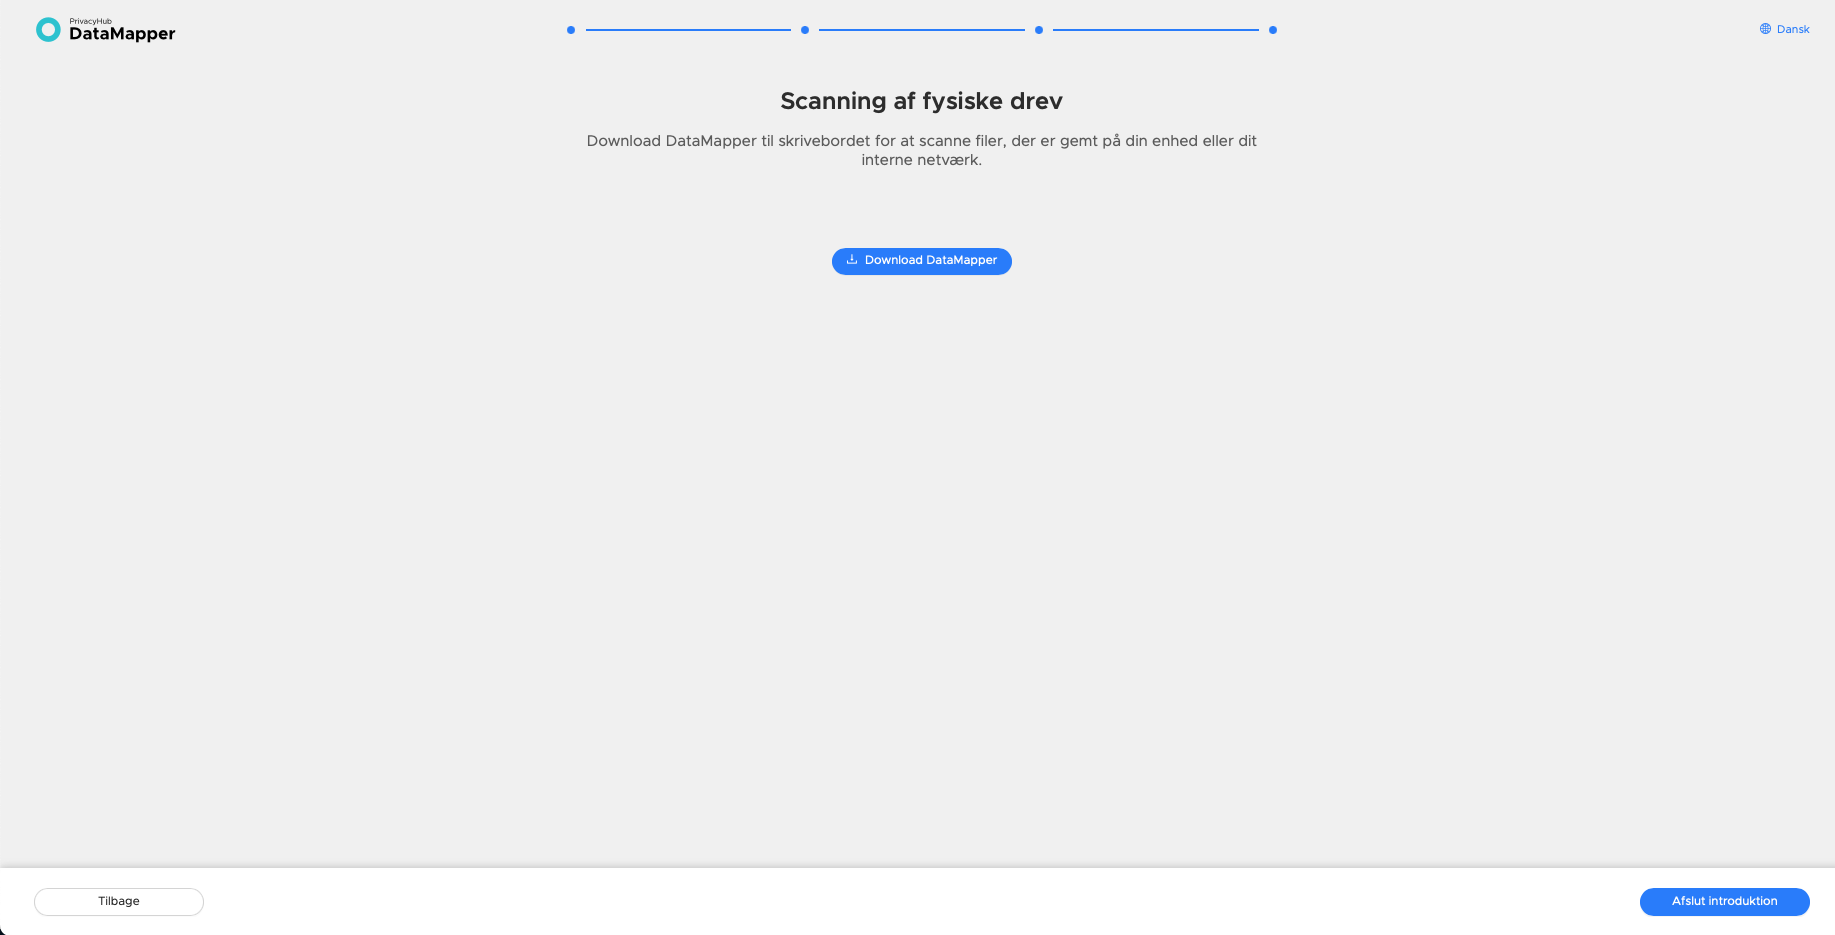
Screen 4. Finish introduction
The last step is optional - setting up scanning of physical drives. This will only be shown if your administrator has connected these. You can also skip this step if it hasn't been agreed with your administrator. In that case, click Finish introduction.
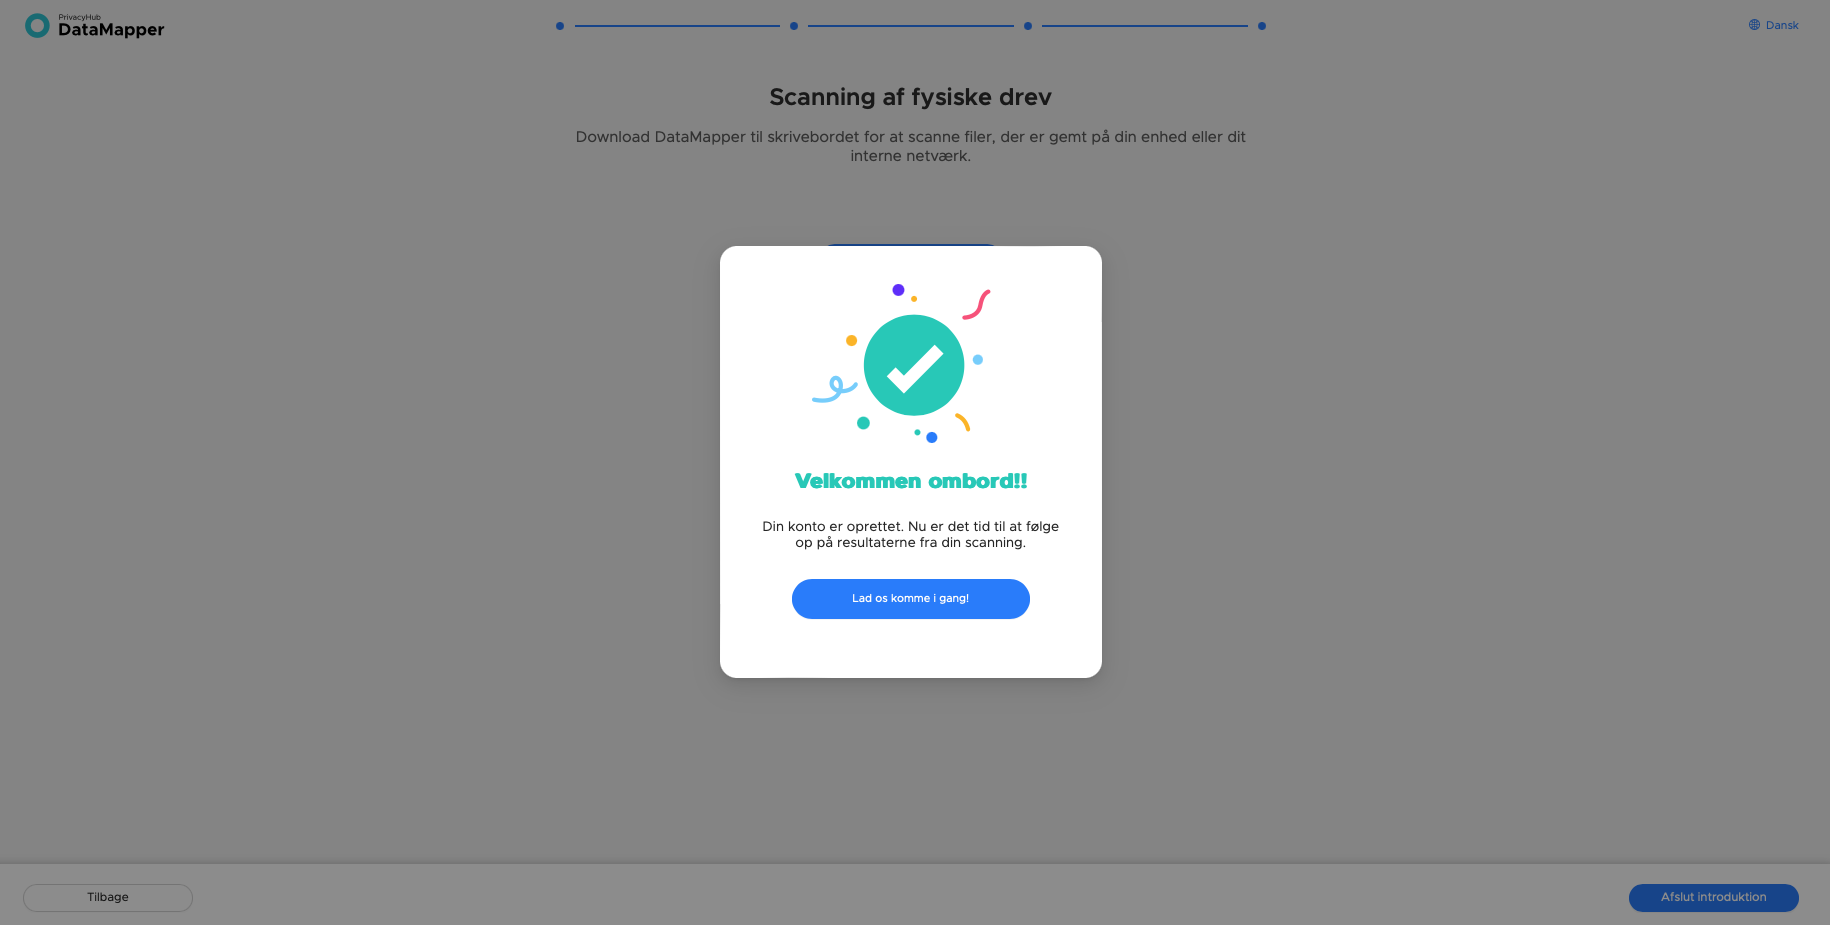
Screen 5. "Welcome aboard!"
The last screen you'll see in the setup flow - and then you're ready - is "Welcome aboard!" - click let's get started.
Step 3: Overview of data sources
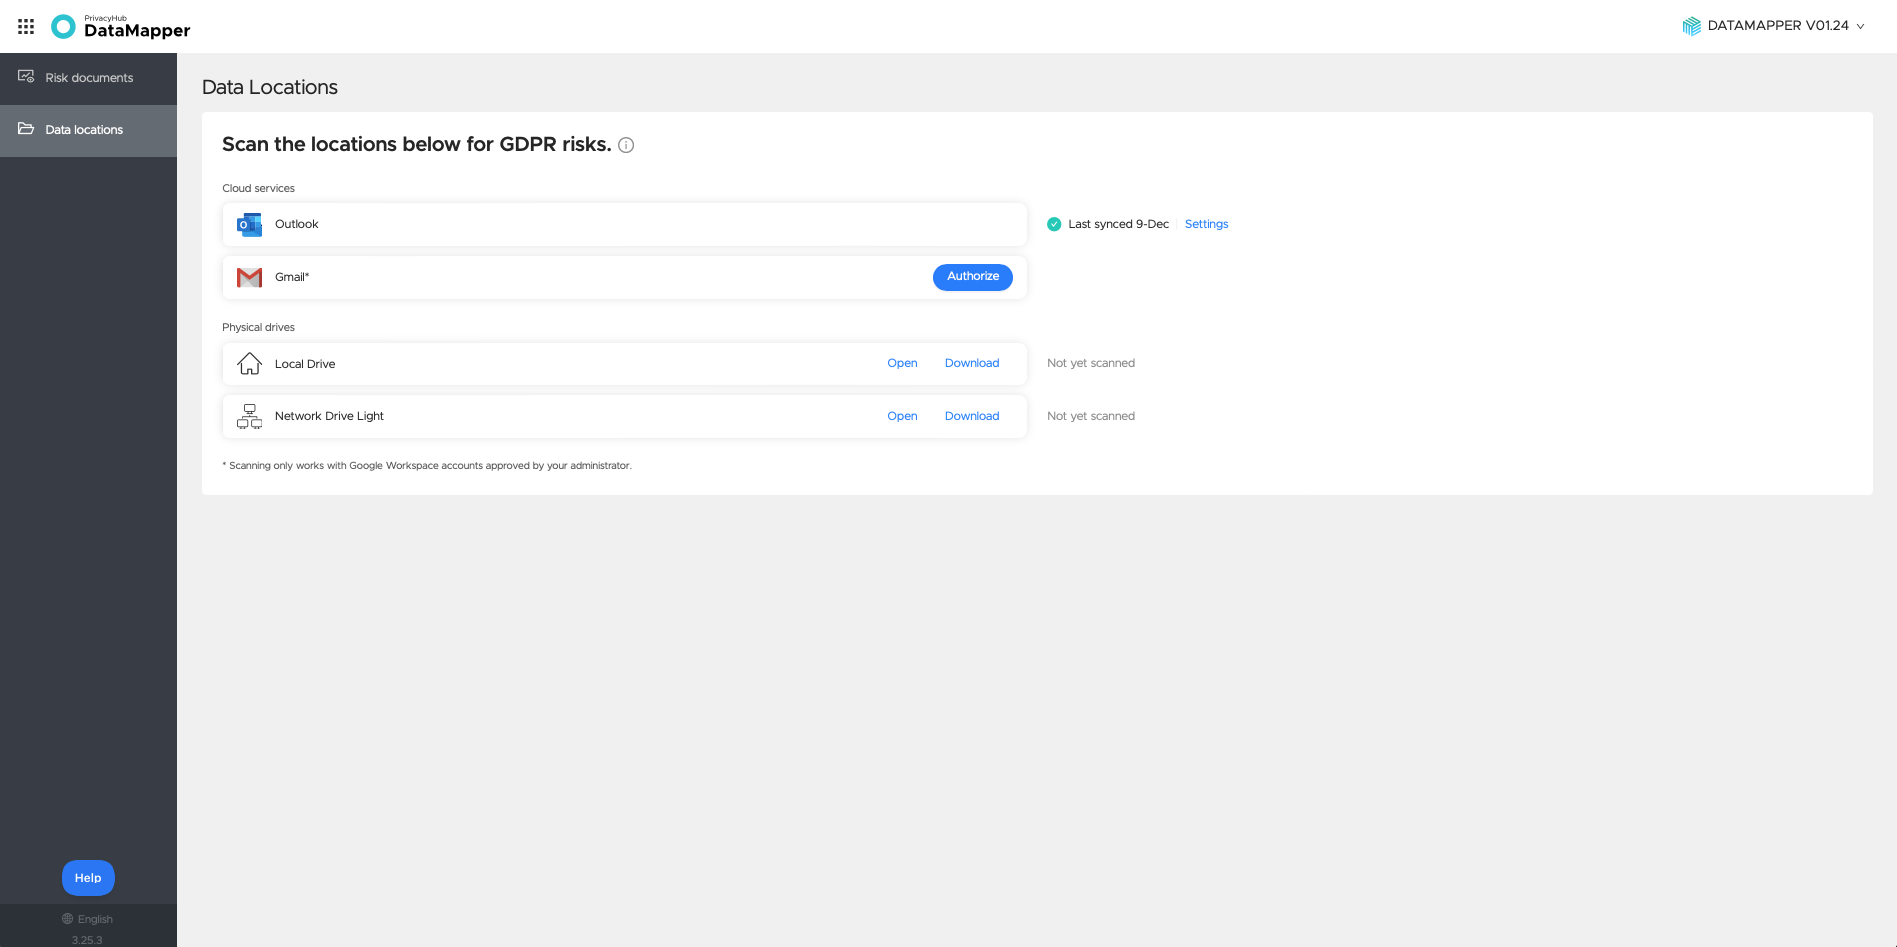
Once you've completed your setup for the first time as a new user, you will see Data Locations as shown below, every time you log in. This page is just an overview for you.
Step 4: Find and delete sensitive documents
DataMapper finds and highlights sensitive and personal documents across the selected data locations where scanning has started, which may pose a potential GDPR risk.
Now it's time to start the actual cleanup.
🎥 Watch a short video about how to find and sort your documents with sensitive data.
- Click "Risk documents" in the side menu
In this overview, you'll see all the files that contain a potential GDPR risk and that you're responsible for cleaning up. If you're unsure how to handle the documents, talk to your DataMapper administrator or your department manager about how to proceed when starting the file cleanup.
The administrator cannot see the content, only the subject field and which GDPR risk it contains, per DataMapper's consent rules you were presented with during onboarding.
Below you can see what this will look like for you. DataMapper sorts files by title, risk, location, sender, and date.
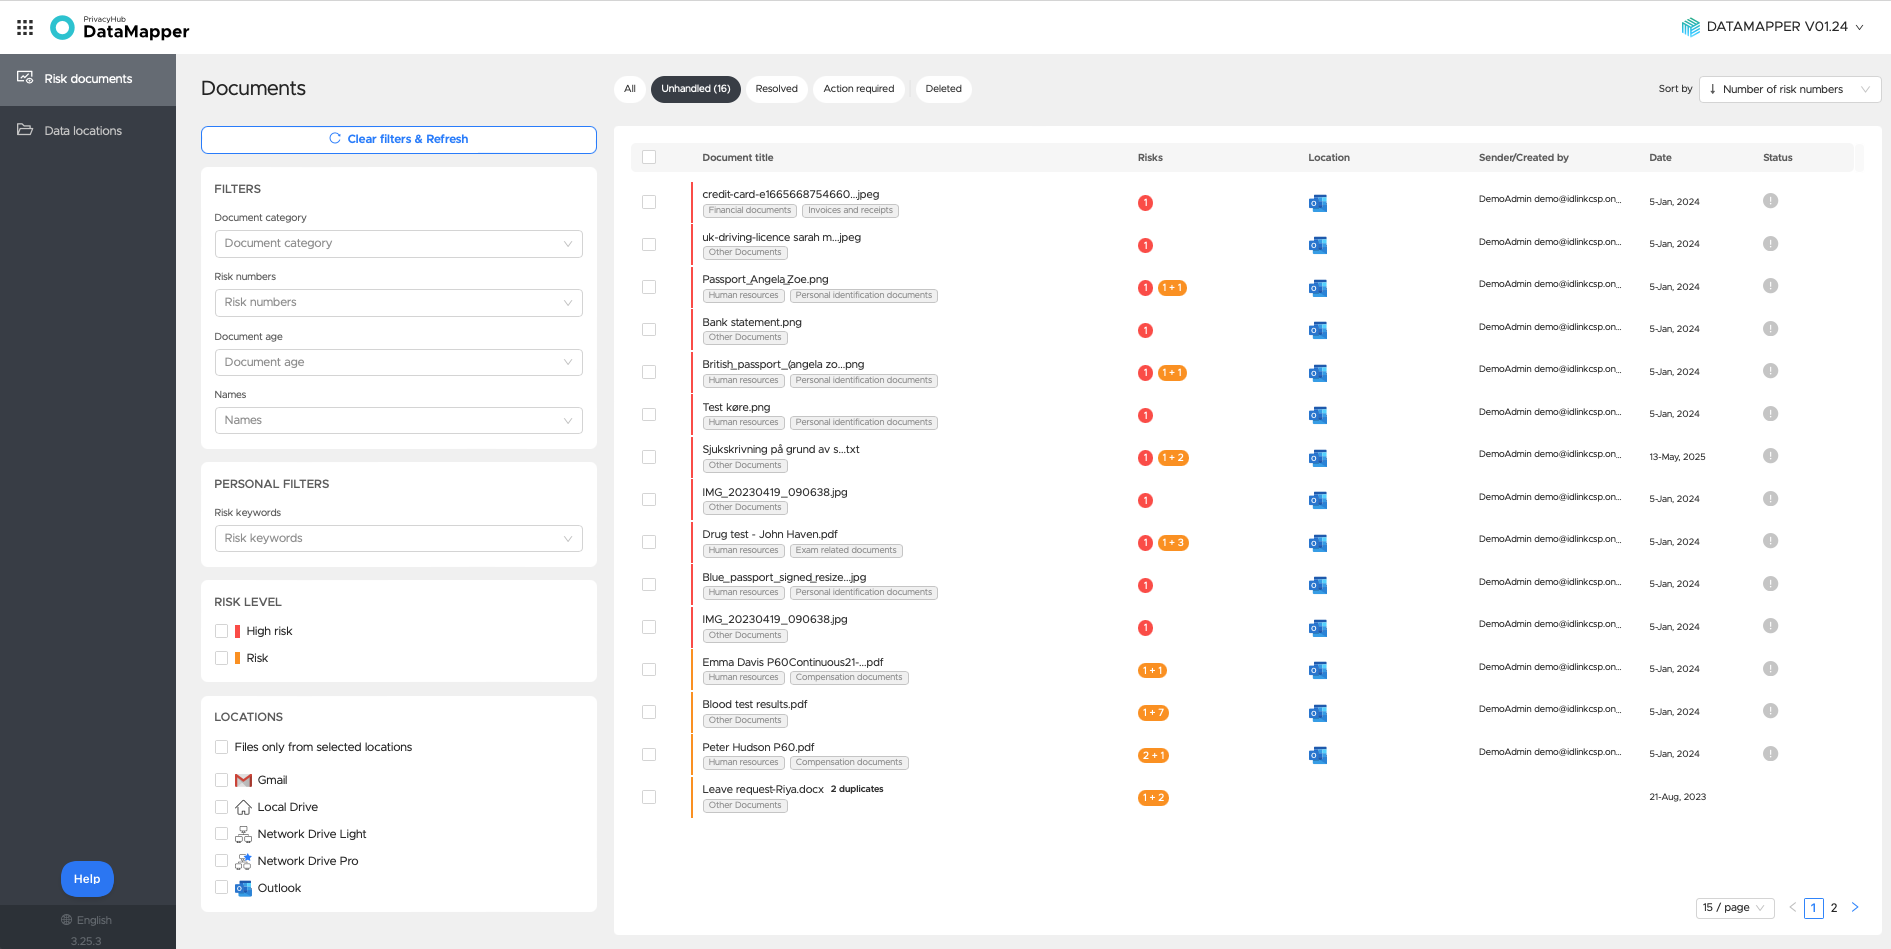
- Choose between: All, Unhandled, Resolved, Action required or Deleted to get an overview of the files. All new files that haven't been handled yet, by default, are listed "Unhandled".
- Filter options on the left can help you review your files in a more focused way - for example, you can filter out files containing passport numbers, a specific type, name, document age, etc. Apply where needed.
- Click anywhere on a document in the overview to see why it's flagged as sensitive data - or hover over, for example, on numbers (the red figures) or keywords (the orange figures) to see what's marked in the file.
- Via Preview you can see more info on the document if the first few info did not give you enough to make a decision on what to do with the file.
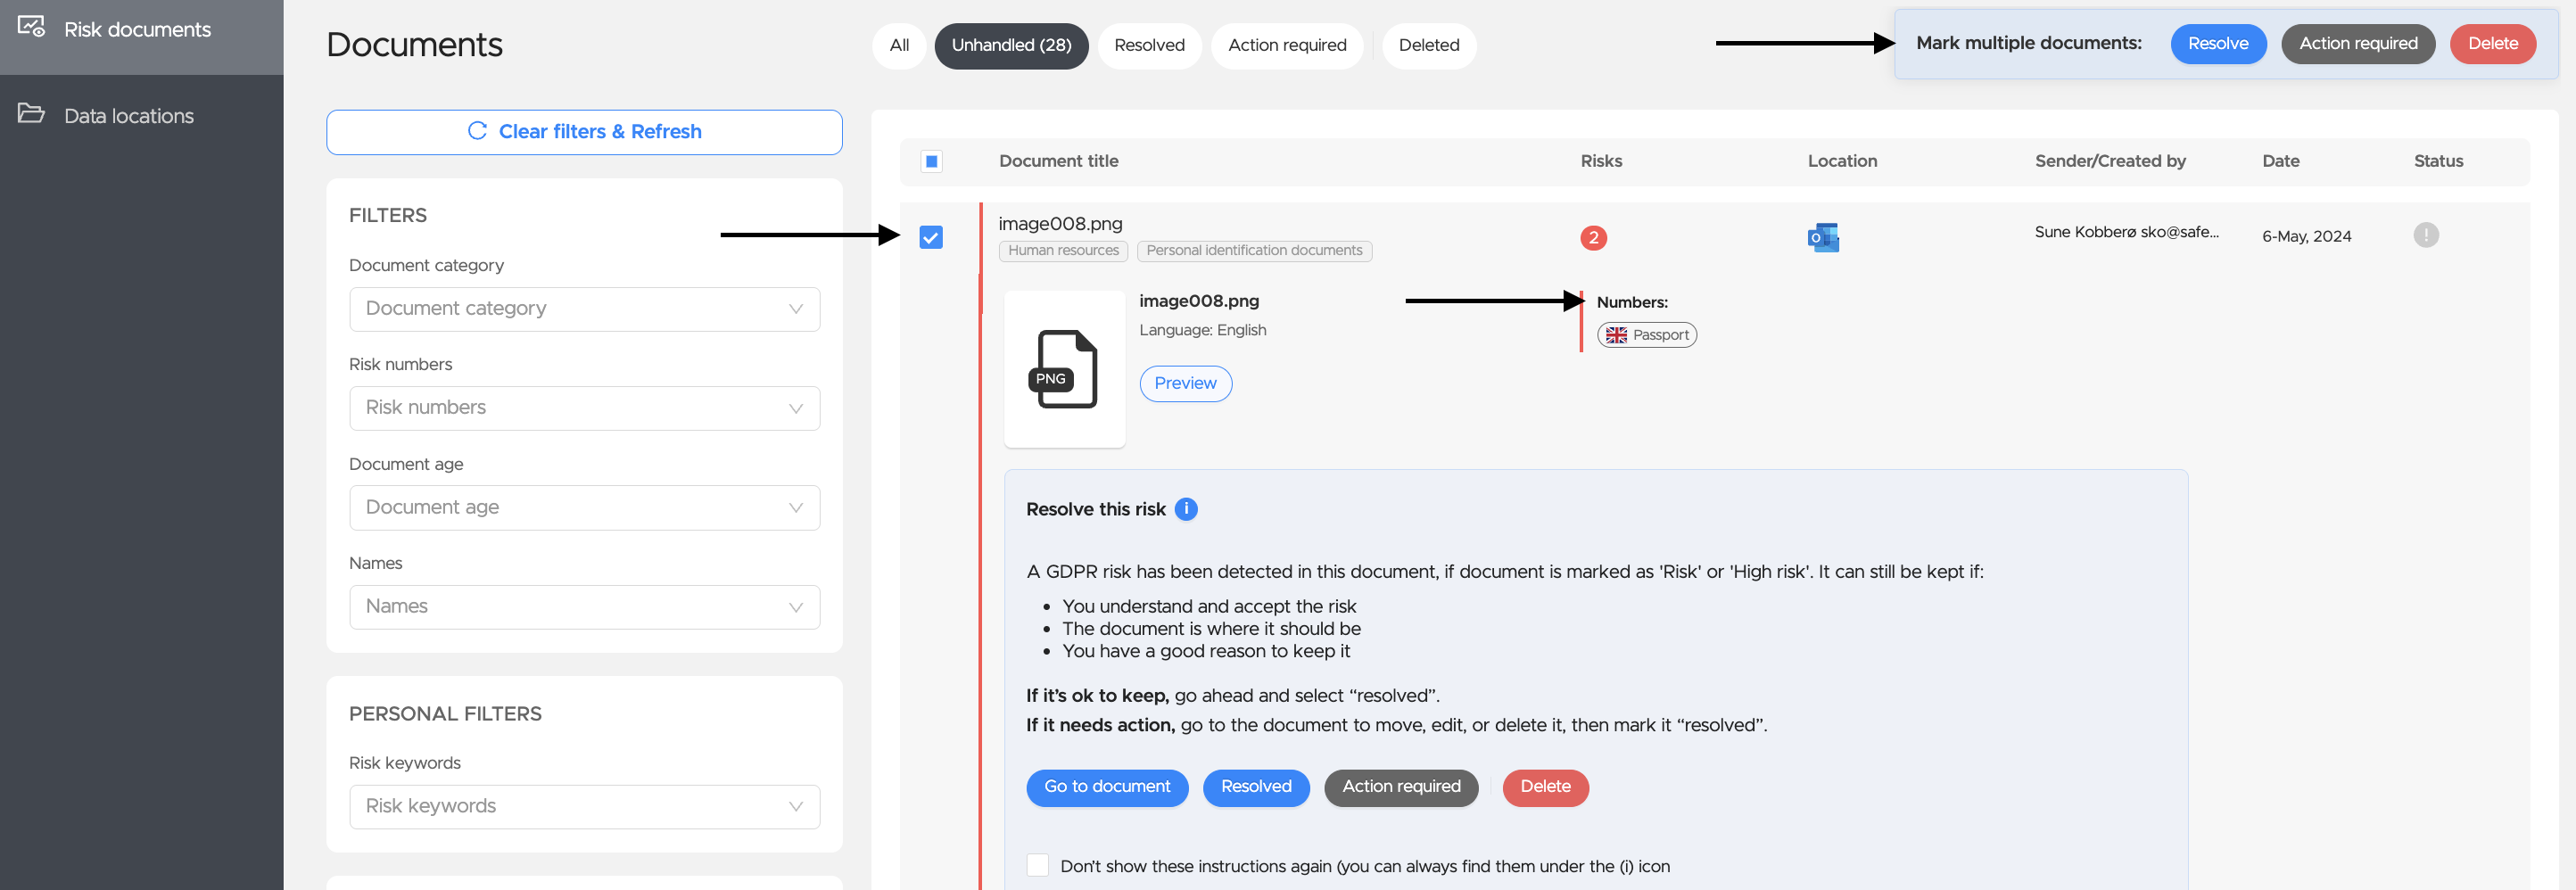
- Mark the documents as "Resolved", "Action required", or "Delete".
Choose a document and click on.
- "Resolved", if you've assessed that it contains a risk but you're not ready to delete the file completely
- "Action required" if you need to come back to it later. Always follow your organization's internal policies.
- "Delete": Before you can delete files in DataMapper so that they're also deleted in Outlook, you need to enable the feature under Data Locations - Outlook - Settings (see more here: How to delete in DataMapper). Then you can quickly and easily clean up your files!
❗️We generally recommend starting with High-risk documents, since these files are often easier to review based on numbers and document age, whereas risk files (keywords) may take a bit longer to work through.
❗️Remember to check the "age" of your files - if they're more than 5 years old, you should delete the documents right away. In the filter on the left, you can select an age range from 1 to 5.

Do you have more questions? You can message us via the chat in DataMapper or send us an email at support@safeonline.dk 😊